주요 콘텐츠로 건너뛰기

Zeki Droid Tablet Front Screen Replacement

필요한 것

  1. Zeki Droid Tablet Front Screen Replacement, Back Casing: 1 단계, 이미지 1/1
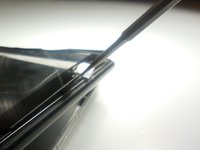
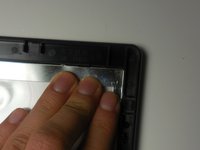
    • Remove the back casing by slowly popping each tab out with a plastic opening tool.

  2. Zeki Droid Tablet Front Screen Replacement: 2 단계, 이미지 1/1
    • Remove the tapes one by one from the connecting wires with tweezers.

  3. Zeki Droid Tablet Front Screen Replacement: 3 단계, 이미지 1/1
    • Remove the black clips from both sides of the casing with a plastic opening tool.

    • The clips should pop off separate from the speakers.

  4. Zeki Droid Tablet Front Screen Replacement: 4 단계, 이미지 1/1
    • Remove the speakers from the back casing.

    • Do not tug on the speakers because they are connected to fragile wires.

  5. Zeki Droid Tablet Front Screen Replacement: 5 단계, 이미지 1/1
    • Pull the speakers away from the back casing carefullly.

  6. Zeki Droid Tablet Front Screen Replacement, Front Screen: 6 단계, 이미지 1/1
    • Detach the motherboard from the framing by removing the four screws using a Phillips #000 screwdriver.

  7. Zeki Droid Tablet Front Screen Replacement: 7 단계, 이미지 1/1
    • Lift the camera and flash components from their fittings using tweezers.

  8. Zeki Droid Tablet Front Screen Replacement: 8 단계, 이미지 1/1
    • Lift the metal framing to reach the components at the front of the device.

    • Do not pull the framing completely off. There is a ZIF connecter holding it in place.

  9. Zeki Droid Tablet Front Screen Replacement: 9 단계, 이미지 1/2 Zeki Droid Tablet Front Screen Replacement: 9 단계, 이미지 2/2
    • Push the screen forward to remove.

결론

To reassemble your device, follow these instructions in reverse order.

Kyla

회원 가입일: 03/11/15

156 평판

안내서 2개 작성하였습니다

Colorado Springs, Team 2-6, Panko Spring 2015 Colorado Springs, Team 2-6, Panko Spring 2015 회원

UCCS-PANKO-S15S2G6

3 회원들

안내서 10개 작성하였습니다

댓글 0개

댓글 쓰기

조회 통계:

24 시간 전: 0

7일 전: 3

30일 전: 9

전체 시간: 304