이 번역은 원본 안내서의 최신 업데이트를 반영하지 않을 수 있습니다. 번역 업데이트를 돕거나 아니면 원본 안내서 보기를 참조하세요.
소개
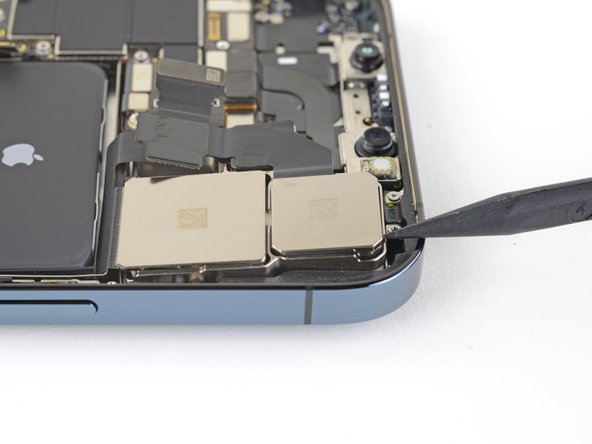
이 안내서를 사용하여 iPhone 12 Pro Max 후면 카메라를 분리하고 교체하세요. 모든 카메라 모듈은 일체형으로 교체됩니다.
필요한 것
-
-
분해를 시작하기 전에 iPhone 전원을 꺼주세요.
-
iPhone 하단 가장자리에 위치한 6.7mm-길이 pentalobe/펜타로브 P2 나사 두 개를 분리하세요.
-
-
-
iPhone 스크린 전체가 덮일 때까지 투명 포장 테이프를 겹쳐 붙이세요.
-
만약 다음 몇 과정에서 흡입 컵이 스크린에 잘 붙지 않으면, 강력 테이프(덕트 테이프 등)를 접어 손잡이 형태로 만들어 붙이고 들어 올리세요.
-
-
-
파란색 손잡이를 뒤로 당겨 안티-클램프의 팔을 잠금 해제하세요.
-
팔을 휴대폰의 왼편 또는 오른편 가장자리 위로 밀어 주세요.
-
흡입 컵을 휴대폰의 하단 가장자리에 배치하세요—전면에 하나, 후면에 하나.
-
적절한 위치에 컵을 함께 꽉 쥐고 흡착하세요.
-
-
-
-
흡입 컵을 확실하고 일정한 압력으로 위로 당겨 스크린과 프레임 사이에 약간의 틈을 만드세요.
-
스크린의 플라스틱 베젤 밑에 여는 픽을 끼우세요.
-
-
-
-
오른편 가장자리가 사용자를 향하도록 iPhone을 돌려주세요.
-
디스플레이를 오른편에서 돌려 iPhone을 여세요, 책의 앞 표지처럼.
-
휴대폰에 작업하는 동안 디스플레이를 다른 물건에 기대어 세워 놓으세요.
-
-
-
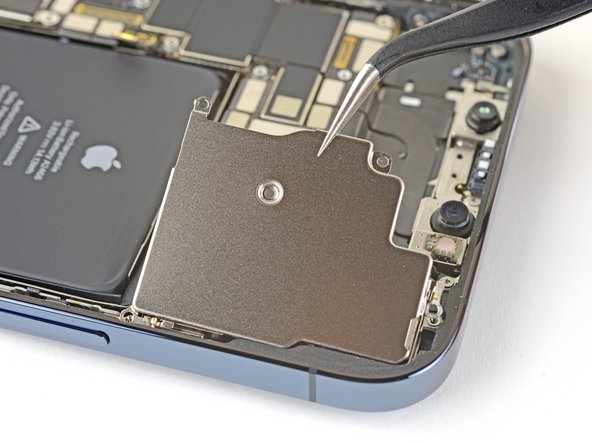
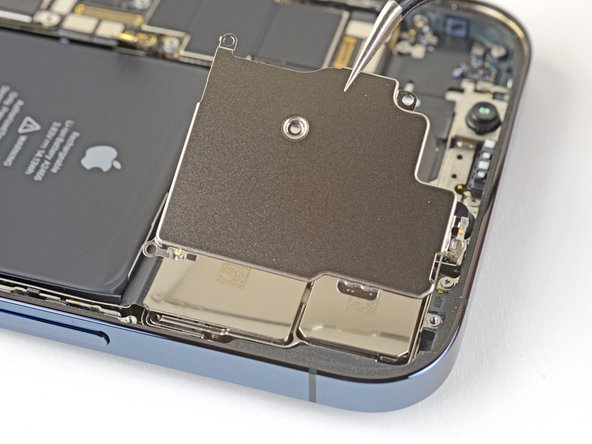
배터리와 디스플레이 커넥터 커버를 고정하는 1.1mm 길이 Y000 나사 두 개를 풀어주세요.
-
-
-
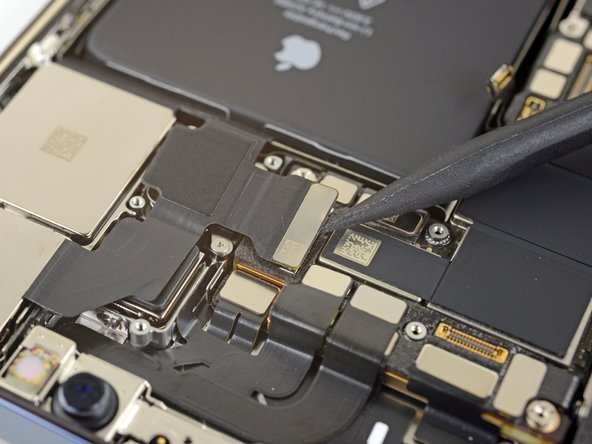
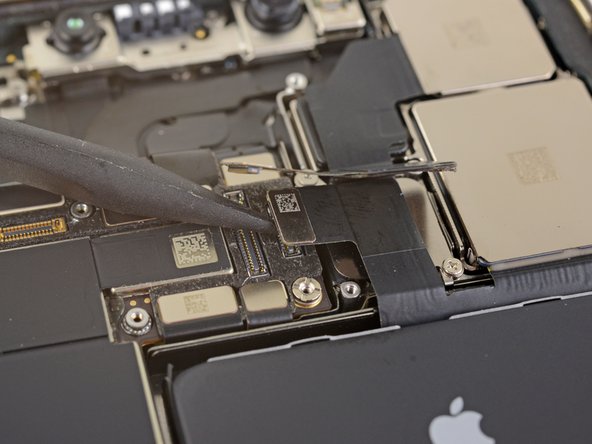
Spudger/스퍼저 또는 깨끗한 손톱으로 배터리 커넥터를 로직 보드의 커넥터 소켓에서 들어올리세요.
-
수리 도중에 실수로 배터리가 소켓에 닿지 않도록 커넥터를 로직 보드에서 바깥쪽으로 약간 구부려 주세요.
-


새 교체 부품을 원래 부품과 비교하세요—설치하기 전에 원래 부품에서 남은 부품을 옮기거나 새 부품에서 접착 뒷면을 제거해야 할 수도 있습니다.
기기를 재조립하려면, 위의 단계를 역순으로 따르세요.
전자 폐기물을 R2 또는 e-Stewards 인증 재활용 업체로 가져가세요.
수리가 계획대로 진행되지 않았습니까? 자사의 기본 문제 해결 페이지를 읽거나 iPhone 12 Pro Max 답변 커뮤니티에서 도움을 받으세요.
새 교체 부품을 원래 부품과 비교하세요—설치하기 전에 원래 부품에서 남은 부품을 옮기거나 새 부품에서 접착 뒷면을 제거해야 할 수도 있습니다.
기기를 재조립하려면, 위의 단계를 역순으로 따르세요.
전자 폐기물을 R2 또는 e-Stewards 인증 재활용 업체로 가져가세요.
수리가 계획대로 진행되지 않았습니까? 자사의 기본 문제 해결 페이지를 읽거나 iPhone 12 Pro Max 답변 커뮤니티에서 도움을 받으세요.
다른 11명이 해당 안내서를 완성하였습니다.
다음 번역가들에게 특별히 감사 드립니다:
84%

Christian Kim님은 저희가 세상을 수리하는데 동참하신 분입니다! 기여하시겠습니까?
번역 시작하기 ›

댓글 7개
I am having issues with image focusing after replacing the back camera for this model. The camera is able to focus on wide angles but not on 1x zoom or higher. We have reset the device and ensured it is fully up to date and the issue has persisted. My conclusion is that the camera is faulty and I will need a new replacement camera. Anything else I might be missing?
This guide should start by saying that an iPhone 12 camera repair or replacement can NOT be made without access to a proprietary Apple tool which is only available to technicians authorized by the company. The issue was confirmed by an Apple training guide, which informs technicians that they will need to run Apple’s proprietary, cloud-linked System Configuration app in order to carry out camera repairs or replacements.
In short, this prevents DIY repairs at home, as well as those by third-party companies who do not have access to the online software tool …
So the repair guide is great. However you should not buy the camera from ifixit. You need to go to https://selfservicerepair.com/ and buy the camera there. You can get all the tools and anything you need from ifixit but you need to order the part from the apple selfservicerepair and enter your serial number. Then follow this guide and contact them through your order details to initiate the calibration. The process requires you to contact the service rep and have them connect to your phone and lead you through the calibration. Worked like a charm and wasn't that hard of a repair. Thanks ifixit for all of the info!
Would this fix a buzzing noise coming from the camera?