소개
수월한 수리를 위해 자사의 수리 키트와 이 짤막한 안내서를 따라서 iPhone 스크린 전체를 교체하세요.
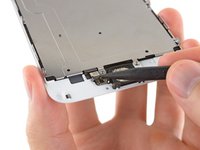
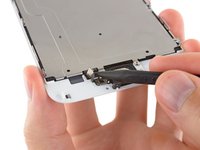
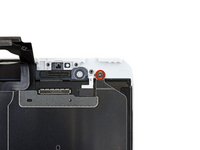
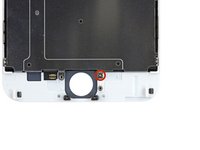
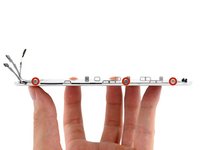
고급 수리인에게 이 안내서는 iPhone LCD 및 디지타이저 어셈블리“만” (일명 기본 "전면 패널") 교체하는데 도움이 됩니다. 이 교체는 전면 카메라, 이어피스 스피커, LCD 실드 플레이트 및 홈 버튼 어셈블리를 포함—여러 부품들을 설치하기 전에 원래 스크린에서 새 스크린으로 옮겨야 합니다.
모든 스크린/디스플레이를 수리할 때,
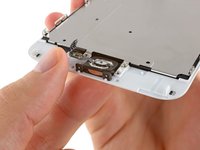
Touch ID가 (지문 스캔) 작동하려면 원래 홈 버튼을 새 디스플레이로 옮기는 것이 중요합니다.
필요한 것
동영상 개요
-
-
분해를 시작하기 전에 iPhone 전원을 끄세요.
-
Lightning 커넥터 옆에 위치한 3.6mm-길이 P2 Pentalobe/펜타로브/별나사 두 개를 풀어주세요.
-
-
-
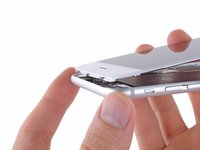
디스플레이 유리가 깨진 경우 깨진 유리에 테입을 붙여서 수리 도중 추가 파손을 막고 신체적 상해를 방지하세요.
-
스크린 전체가 덮일 때까지 iPhone 디스플레이 위에 포장 테이프 스트립을 겹쳐 붙이세요.
-
유리 파편으로 인해 다음 몇 단계에서 흡입 컵이 붙지않는 경우 강한 테이프를 (예: 강력 접착테이프) 접어서 손잡이를 만들어 디스플레이를 들어 올리세요.
-
-
이 단계에 사용된 도구:Clampy - Anti-Clamp$24.95
-
파란색 손잡이를 뒤로 당겨 안티-클램프의 팔을 잠금 해제하세요.
-
팔을 휴대폰의 왼편 또는 오른편 가장자리 위로 밀어 주세요.
-
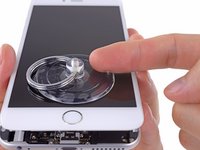
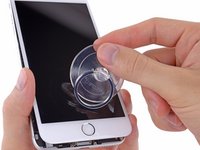
흡입 컵을 휴대폰의 하단 가장자리 홈 버튼 근처에 배치하세요—전면에 하나, 후면에 하나.
-
적절한 위치에 컵을 함께 꽉 쥐고 흡착하세요.
-
-
-
-
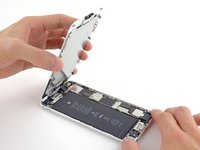
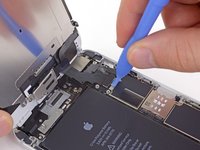
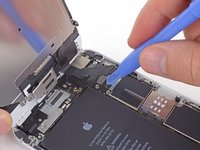
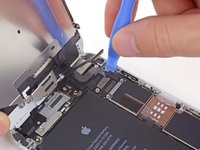
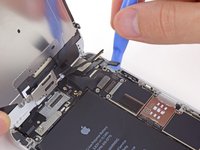
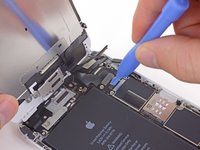
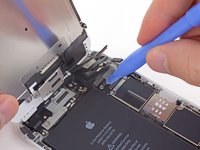
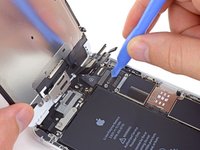
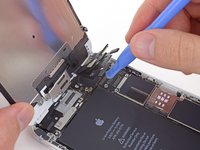
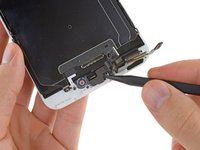
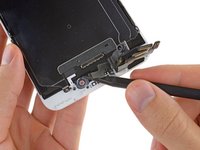
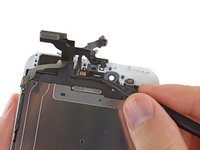
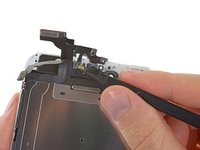
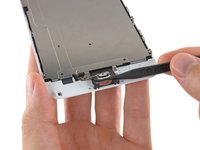
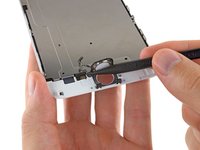
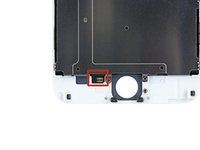
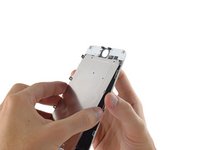
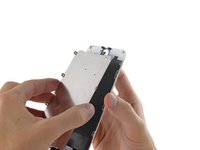
LCD 쉴드 플레이트를 디스플레이 어셈블리에 고정하는 1.7mm Phillips/십자 나사 두 개를 (위에 하나 그리고 아래에 하나) 풀어주세요.
-


기기를 다시 조립하려면 위의 단계를 역순으로 따르세요.
다른 222명이 해당 안내서를 완성하였습니다.
다음 번역가들에게 특별히 감사 드립니다:
100%

Christian Kim님은 저희가 세상을 수리하는데 동참하신 분입니다! 기여하시겠습니까?
번역 시작하기 ›

11가이드 댓글
I know this is a old guide but i have a question. My iphone was screen broken and i change it with a original complete iphone screen, the home button works fine but the touch id dont work. I change the home button to the one that i have in the broken screen and still the touch id dont work. What can i do to fix the touch id?
Juanjo Checo - 답글 공유
Help! The home button cable attached to the metal front panel ripped a little as I was gently using my fingers to lift it off the screen. Now the home button doesn't work. Did I ruin the phone or is it possible to get a front panel?
Merry Hansen - 답글 공유
I recently purchased this iFixit kit for my iPhone 6 Plus replacement of my screen that was cracked. I followed the instructions above, and my phone won't turn on. There is a part in to the right of the battery, just below the screen connections, that is really hot. After I noticed it wouldn't turn on, even after plugging it in, I took it back apart, and reseated the connections again. It still doesn't work. I will not purchase this kit again.
Dustin Klumb - 답글 공유
Bought this recently and I must say that I'm a little bit disappointed:
- the screen doesn't fit as before, you can feel a rough edge - I tried 4 times to put it correctly watching many video tutorials and I had the same result so I assume it's because it's not an original screen
- the colours are not the same anymore, looks like the saturation is on a lower setting - can't see the bright colours anymore
Overall I would rate this part 6 out of 10.
andrewbuta - 답글 공유