이 버전에는 잘못된 편집 사항이 있을 수 있습니다. 최신 확인된 스냅샷으로 전환하십시오.
필요한 것
-
-
분해를 시작하기 전에 iPhone 전원을 끄세요.
-
iPhone 하단 가장자리 Lightning 커넥터 옆에 위치한 3.4mm P2 Pentalobe/펜타로브/별나사 두 개를 풀어주세요.
-
-
-
파란색 핸들을 뒤로 당겨 Anti-Clamp의 팔을 풀어 주세요 .
-
Anti-Clamp의 팔을 iPhone의 왼편 또는 오른편 가장자리로 밀어 주세요.
-
흡입 컵을 iPhone의 홈 버튼 바로 위 하단 가장자리 근처에 배치하세요—전면에 하나, 후면에 하나.
-
흡입 컵을 함께 눌러서 원하는 부위에 흡입하세요.
-
-
-
-
배터리 커넥터 브래킷을 고정하는, 다음 길이의, 십자 나사 두 개를 분리하세요:
-
2.9mm 나사 한 개
-
2.2mm 나사 한 개
-
-
이 단계는 번역되지 않았습니다. 번역을 도와주십시오
-
Use the point of a spudger to lift and disconnect the antenna cable from the bottom end of the logic board.
-
-
이 단계는 번역되지 않았습니다. 번역을 도와주십시오
-
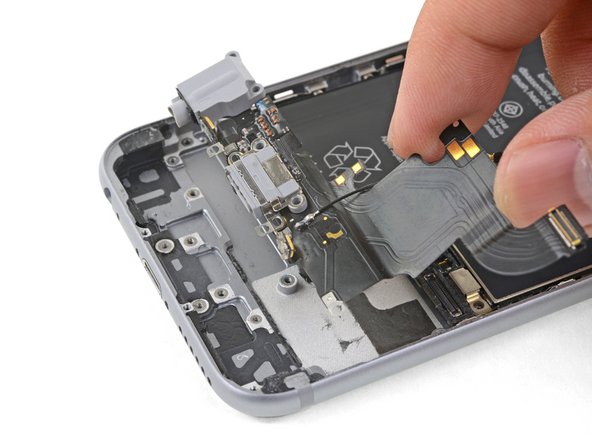
Use the point of a spudger to lift up and disconnect the Lightning connector ribbon cable from its socket on the logic board.
-
-
이 단계는 번역되지 않았습니다. 번역을 도와주십시오
-
Use the point of a spudger to lift and disconnect the antenna cable from its socket near the top of the logic board.
-
-
이 단계는 번역되지 않았습니다. 번역을 도와주십시오
-
Carefully lift the antenna cable and de-route it from the edge of the phone. Use the point of a spudger to help lift the cable to free it from the retaining clips.
-
-
이 단계는 번역되지 않았습니다. 번역을 도와주십시오
-
Remove the following Phillips screws securing the speaker to the rear case:
-
Two 2.6 mm screws
-
One 2.3 mm screw
-
One 2.3 mm screw
-
One 3.0 mm screw
-
-
이 단계는 번역되지 않았습니다. 번역을 도와주십시오
-
Insert the flat end of a spudger between the long edge of the speaker module and the case wall.
-
Pry gently to loosen the speaker module.
-
Once the module is loose, lift and remove the speaker module from the phone.
-
-
이 단계는 번역되지 않았습니다. 번역을 도와주십시오
-
Remove the two 1.5 mm Phillips screws securing the Taptic Engine to the rear case.
-
Remove the Taptic Engine.
-
-
이 단계는 번역되지 않았습니다. 번역을 도와주십시오
-
Remove the following eight Phillips screws:
-
Two 2.9 mm screws over the headphone jack
-
One 3.7 mm screw over the headphone jack bracket
-
Two 1.4 mm screws on the edge of the iPhone
-
Two 1.9 mm screws on either side of the Lighting connector
-
One 3.0 mm screw to the left of the connector
-
-
이 단계는 번역되지 않았습니다. 번역을 도와주십시오
-
Heat an iOpener and apply it to the back of the phone near the bottom edge for one minute.
-
-
이 단계는 번역되지 않았습니다. 번역을 도와주십시오
-
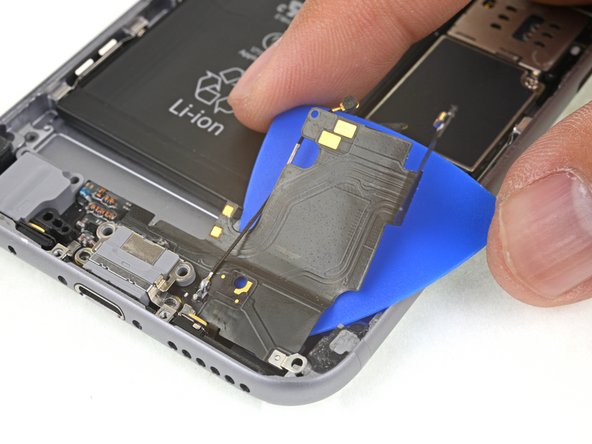
Insert a plastic opening pick between the edge of the rear case and the Lightning connector flex cable.
-
Press the pick underneath the flex cable to break up the adhesive holding it in place.
-
-
이 단계는 번역되지 않았습니다. 번역을 도와주십시오
-
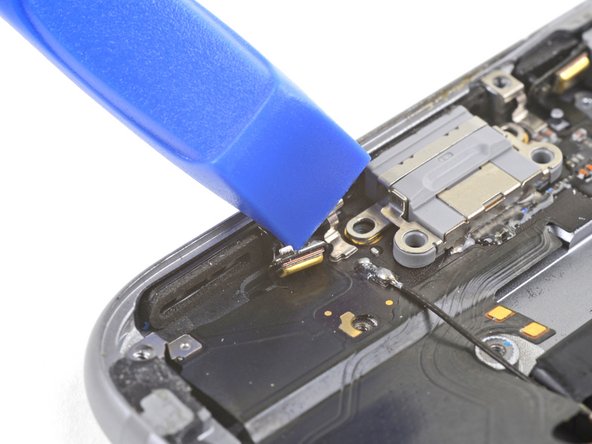
Insert the flat end of a spudger between the Lightning connector assembly and rear case to break up the remaining adhesive.
-
-
이 단계는 번역되지 않았습니다. 번역을 도와주십시오
-
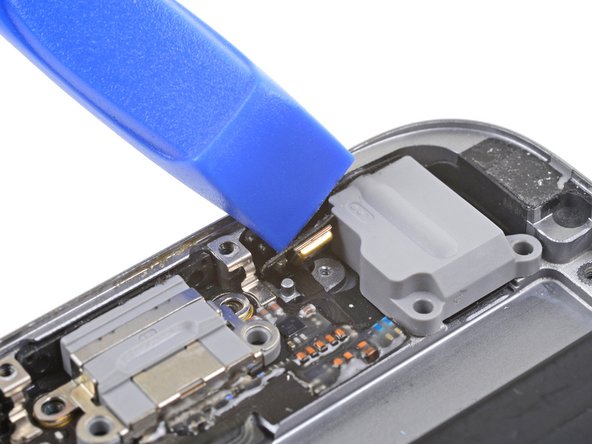
Use an opening tool to separate the microphones from the bottom edge of the rear case.
-
-
이 단계는 번역되지 않았습니다. 번역을 도와주십시오
-
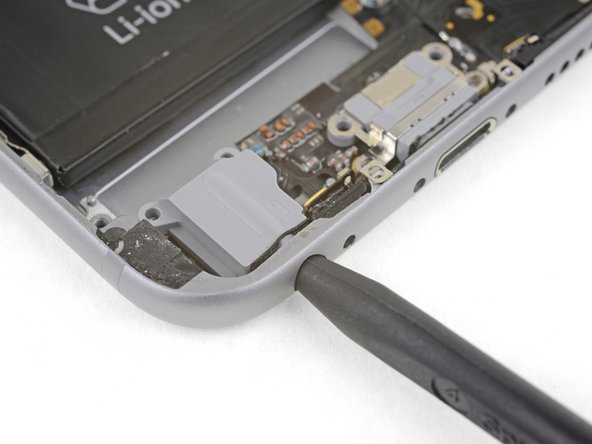
Insert the point of a spudger into the headphone jack and push to loosen the jack from the rear case.
-


다른 322명이 해당 안내서를 완성하였습니다.


댓글 47개
the reason is the antenna is connected to the loud speaker but you can lay it out of the way, remember do not rip the cable that is attached to the speaker
Can you just plug the new assembly in to check it, before going through the whole installation?
cropcord76 - 답글
ya man, just be careful, make sure battery is disconnected before connecting or disconnecting anything
Andrew -
I did this repair and everything went fine. The user now has issues with callers hearing them. Is there a cover/sticker over the microphone on the ifixit replacement part? Speaker works and he can talk on speaker phone with no issues. Any ideas?
Did you pull the old adhesive off before reinstalling using the new adhesive? Did you align each mic correctly?