알림: 귀하는 선행 작업 안내서를 편집하고 계십니다. 변경된 사항들은 이 선행 작업 단계를 포함하는 안내서 18개에 영향을 미칩니다.
1 단계 번역중
1 단계


-
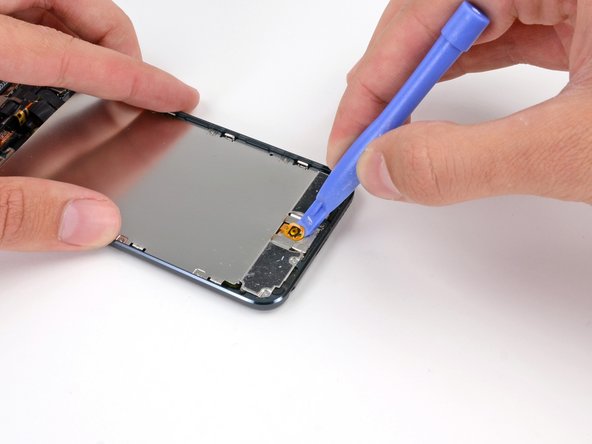
If your iPod has a black home button assembly rather than the orange one shown here, you can skip this step. The button is not attached to the LCD plate and does not need to be removed to complete the repair.
-
Use a plastic opening tool to pry the home button switch up from the LCD plate.
-
It may be necessary to use a heat gun or hair dryer to soften the adhesive on the back of the home button. Always use a low heat setting.
| [* icon_note] Gently fold the display over away from the rest of the iPod, taking care not to disconnect or break any of the ribbon cables. Set the two halves flat on a table or bench. | |
| + | [* black] ***If your iPod has a black home button assembly rather than the orange one shown here, you can skip this step.*** The button is not attached to the LCD plate and does not need to be removed to complete the repair. |
| [* black] Use a plastic opening tool to pry the home button switch up from the LCD plate. | |
| [* black] It may be necessary to use a heat gun or hair dryer to soften the adhesive on the back of the home button. Always use a low heat setting. | |
| [* icon_caution] Do not attempt to remove the home button switch, as it is connected to components below the LCD plate. |
귀하의 기여는 오픈 소스 Createive Commons 라이선스 하에 허가되었습니다.