소개
This repair guide was authored by the iFixit staff and hasn’t been endorsed by Google. Learn more about our repair guides here.
Use this guide to replace the battery in your Google Pixel. With daily use, a typical battery will last around 18-24 months before losing significant capacity. If your phone has to be recharged constantly or turns off suddenly, replacing the battery may be a solution.
Warning: Because of the strong adhesive securing the display, minimal clearance for inserting your tools, and high heat required, there is a good chance of accidentally damaging your display during this procedure. Unless you plan to replace your display in conjunction with this repair, work very carefully and be prepared to replace the display, should it not work upon reassembly. Follow the instructions carefully and observe all warnings to increase your odds of success.
Before disassembling your phone, discharge the battery below 25%. A charged lithium-ion battery can catch fire and/or explode if accidentally punctured. If your battery is swollen, take appropriate precautions.
The battery is held in place by very strong adhesive. You may need to use high concentration (over 90%) isopropyl alcohol in order to loosen the battery from the phone.
필요한 것
-
-
Turn off the device.
-
Prepare an iOpener to heat the edges of the display and soften the adhesive underneath. Alternatively, you may use a heat gun or a hair dryer.
-
-
이 단계에 사용된 도구:Suction Handle$2.99
-
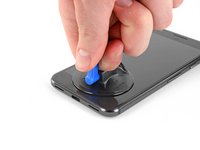
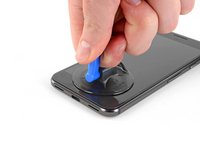
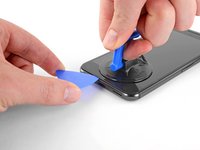
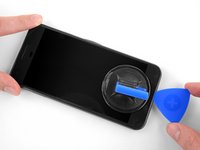
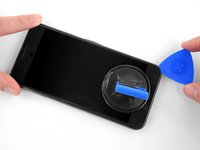
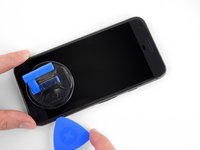
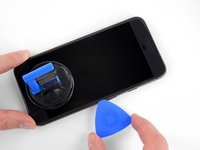
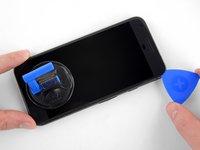
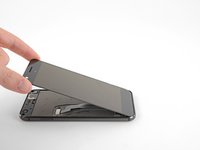
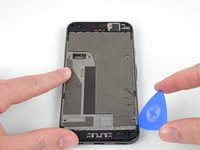
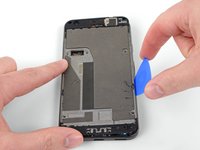
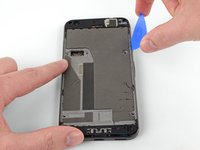
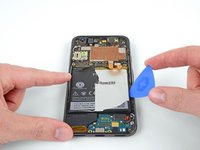
Use a suction handle to pull up on the display and create a slight gap between the display and the phone's chassis.
-
You may need to apply more heat if this doesn't come up. Don't be impatient, this will take time. Once you can gently insert a tool in the gap, move on to the next step.
-
-
-
-
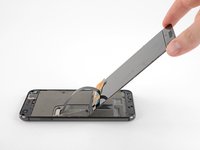
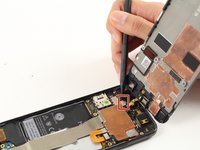
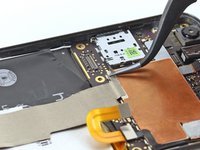
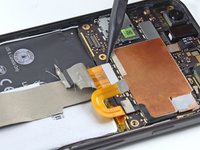
Use a spudger to pry up the battery ribbon cable, disconnecting it from the motherboard.
-
-
-
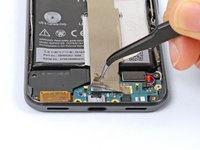
The battery has a jacket that can double as a battery removal tab, pull it to remove the battery. If that doesn't work, follow the instructions below.
-
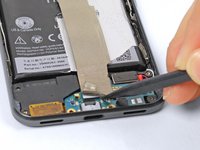
Carefully wedge an opening pick underneath the battery to break the adhesive.
-
If the battery does not come out easily, don't pry aggressively. Apply heat to the back of the phone with an iOpener or a heat gun to loosen the adhesive.
-
-
이 단계에 사용된 도구:Tesa 61395 Tape$5.99
-
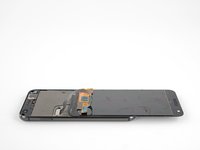
Remove the battery.
-
Remove any remaining adhesive from the phone, and clean the glued areas with isopropyl alcohol and a lint-free cloth.
-
Secure the new battery with pre-cut adhesive or double-sided adhesive tape. Apply the new adhesive to the phone, not directly onto the battery.
-
Press the new battery firmly into place for 5-10 seconds.
-


Compare your new replacement part to the original part—you may need to transfer remaining components or remove adhesive backings from the new part before installing.
To reassemble your device, follow the above steps in reverse order.
After completing this guide, calibrate your newly-installed battery.
Take your e-waste to an R2 or e-Stewards certified recycler.
Repair didn’t go as planned? Check out our Answers community for troubleshooting help.
다른 136명이 해당 안내서를 완성하였습니다.

댓글 73개
I doubt many people can get past step 1 without it being game over. Take special care, read the comments, and other guides as well.
I broke mine too. Not the glass but the display panel underneath.
For those who are going to try opening theirs: pay extreme attention to the fact that the display panel extends somewhat beyond the bottom edge of the visible part of the display where the cable connects and, if that wasn’t bad enough, the bottom bezel has a !&&* of a lot adhesive on it. Don’t insert plastic opening tools on the bottom corners - if you do that, you will damage one of the unprotected corners of the panel like I did. If I had to do that again, I’d probably start from the top edge instead.
The new screen ended up costing me the equivalent of $80, and I was surprised I was able to walk into a store and buy one at all in a country where Pixel was never officially available in the first place. They didn’t have white ones in stock so I went with a black one.
Same. Even when being warned and trying to be super careful.
Another trashed screen. This phone is a difficult one if you have not done one before. I would recommend not even bothering with prying under the sides and just concentrate on the top and bottom. The edges only allow about 2mm at most before you run into the LCD.
Tyler -
+1. Don’t bother trying to save the screen. Just save yourself the stress and buy a new screen on ebay for $35 before you begin. I have never botched a repair and I still managed to break my display on this. Yes, I was super careful, it took me like 45 minutes to finally get the display loose, and when I put it all back together, the display was totally dead.