소개
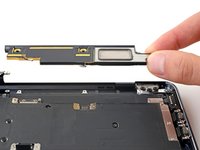
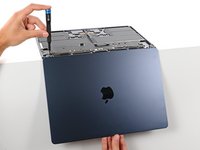
Use this guide to replace a broken screen on your MacBook Air 2022 (M2).
Replacing your screen disables its True Tone functionality.
Before starting this repair, check if your replacement screen has a lid angle sensor pre‑installed on the hinge. If it doesn't, you'll need a 1IP Torx Plus bit to remove and transfer the sensor.
Note: This laptop uses a combination of standard Torx and Torx Plus (IP) screws. In the case that you don't have all the necessary Torx Plus drivers, you can use standard Torx drivers instead. If you do, make sure to use constant, downward force to avoid stripping.
필요한 것
-
-
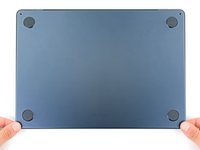
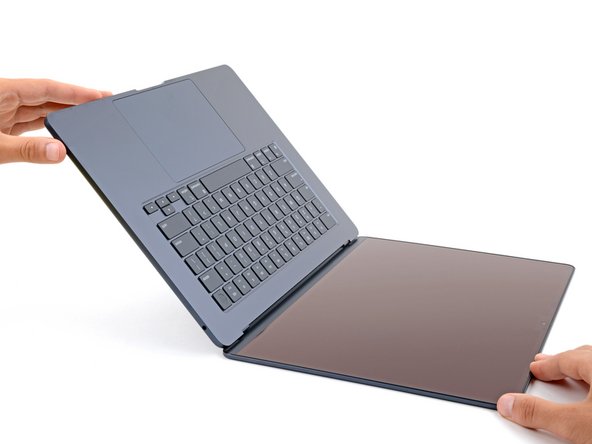
Power off your MacBook Air and unplug all cables.
-
Close the display and flip the laptop upside down. Keep the lid closed until you've physically disconnected the battery.
-
-
이 단계에 사용된 도구:FixMat$36.95
-
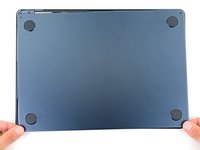
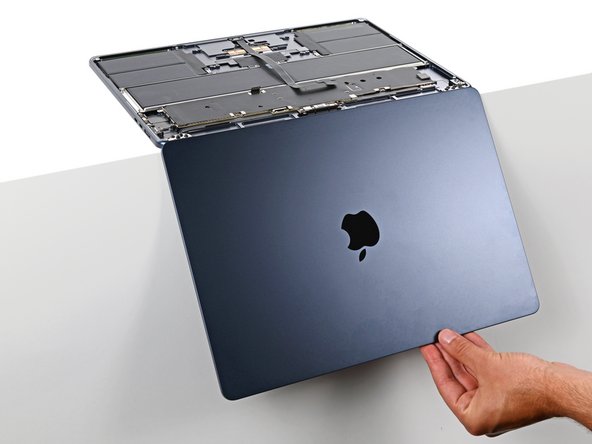
Use a P5 Pentalobe driver to remove the four 6.4 mm screws securing the lower case:
-
Two screws with a short threaded portion near the hinges
-
Two screws with a long threaded portion near the front of the MacBook
-
-
-
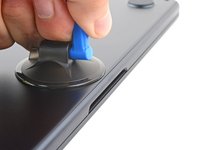
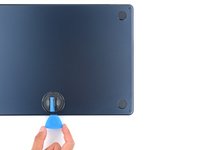
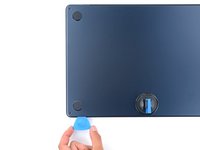
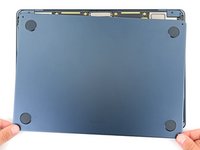
Apply a suction handle to the center of the lower case's front edge.
-
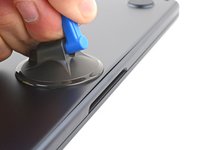
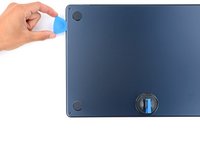
Pull up on the suction handle with strong, steady force to create a small gap between the lower case and the frame.
-
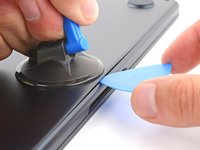
Insert an opening pick into the gap.
-
-
-
Slide the pick to the bottom right corner to release the first clip.
-
Slide the pick around the corner and up the right edge to release the next clip.
-
-
-
Keep the lower case flat and firmly pull it straight away from the back edge, one corner at a time, to disengage the sliding tabs.
It's obvious once you know how, but I think that stating the direction of force you apply to the lower case (towards the front) to separate the sliding tabs would be helpful.
Thank you for the great instructions!
The back tabs are meant to slide down towards the track pad. Do not pull up on the back tabs
-
-
-
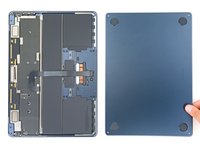
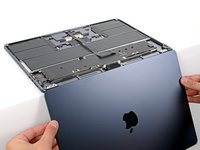
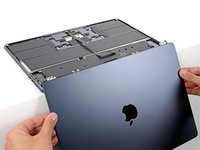
Remove the lower case.
-
Set the lower case in place and align the sliding tabs with the screw heads they slide over. Press down and slide the lower case toward the back edge to engage the tabs—it'll stop sliding as the tabs engage.
-
Once the lower case is flush with the frame, press down firmly along the perimeter to engage the four snapping clips.
Nice !
I'd bet that if iFixit was to source upgraded replacement lower case 'feet' with a material like nearly any earlier macbook air or pros had--less hard and slippery--they'd sell a lot of them. I'd buy several sets. The OEM feet are horrible and not very 'Apple' in quality.
Walt Keyes - 답글
-
-
-
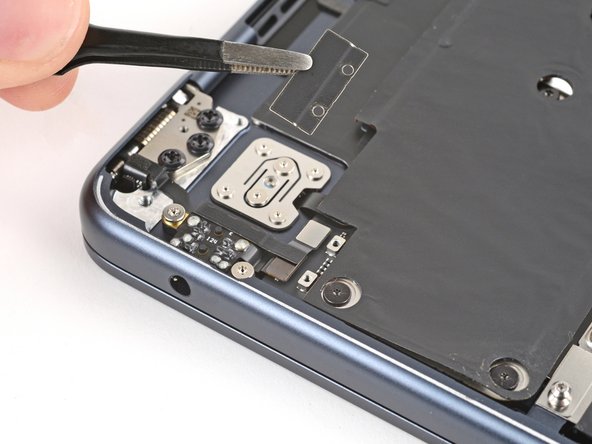
Use a T3 Torx driver to remove the two 1.5 mm screws securing the battery connector cover.
-
-
-
Use an opening pick to pry up and disconnect the battery press connector.
-
-
-
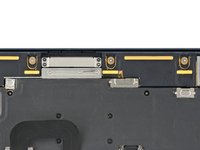
Peel up and remove the foam pad from the lower display cable cover to reveal a hidden screw.
-
-
-
-
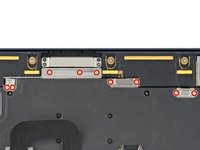
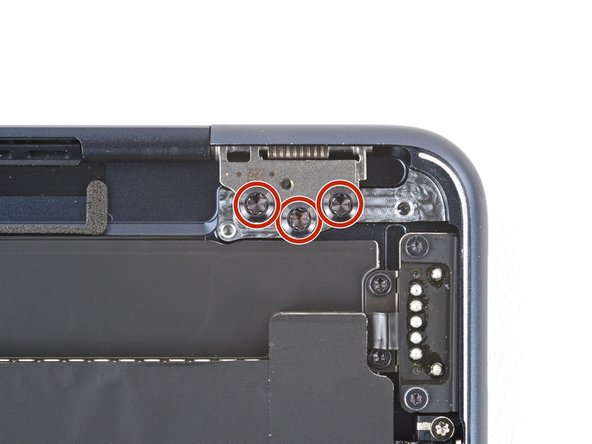
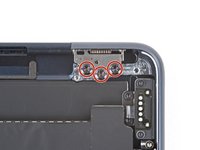
Use a T3 Torx driver to remove the nine 1.5 mm screws securing the four metal covers.
Using a brand new Wiha kit (which I needed to order because I lacked the needed T1 for step 25), the screws were T3, a T4 was too big.
maccentric - 답글
-
-
-
Remove the four screws securing the upper display cable cover:
-
Two 2.5 mm P2 Pentalobe screws
-
Two 2.5 mm 3IP Torx plus screws
I found that using a P1 was necessary as the P2 doesn't fit. It could also be the screws that were installed vary slightly.
Tech Medic - 답글
I think you need a new p2 bit
Mucho cuidado, aunque los tornillos estén duros, si se hace demasiada fuerza hacia abajo pueden romperse los soportes inferiores.
Alquimista - 답글
-
-
-
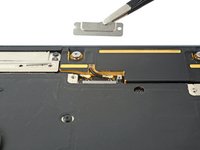
Use the pointed end of a spudger to pry up and disconnect both display cable press connectors.
-
-
-
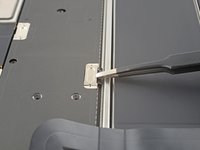
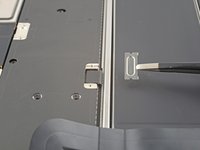
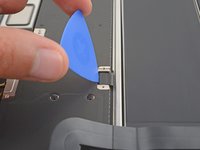
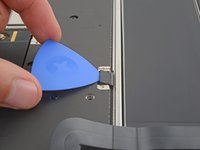
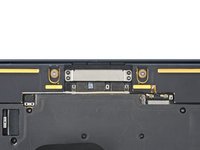
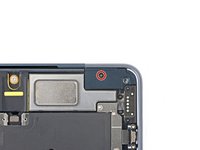
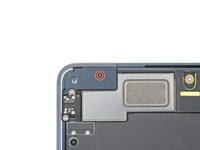
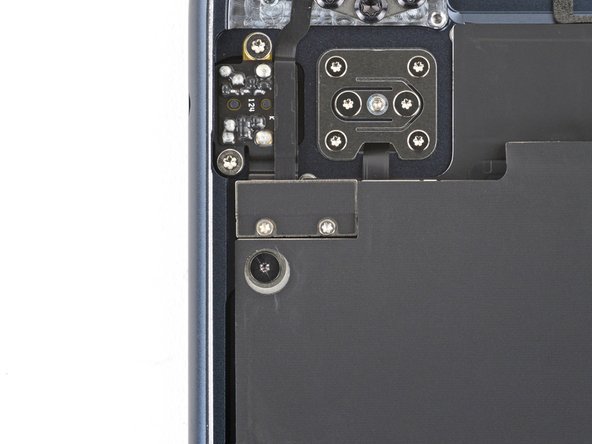
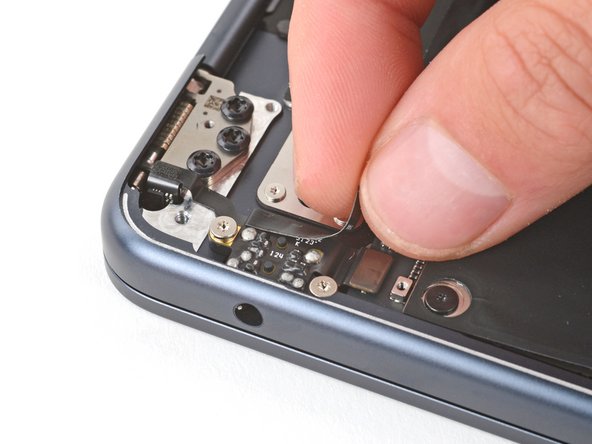
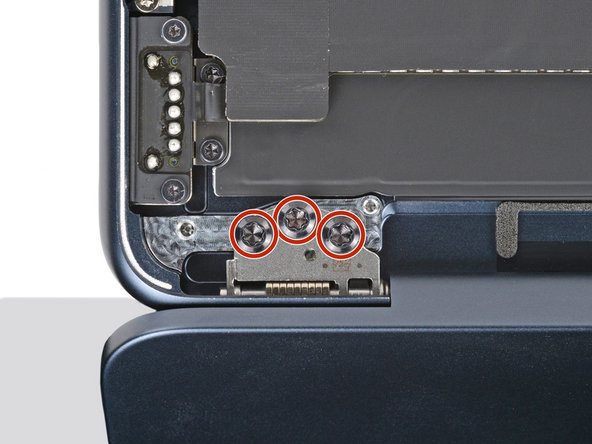
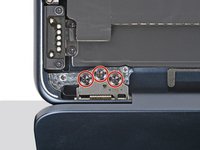
Use a 3IP Torx Plus driver to remove the two 2.6 mm screws securing the right and left hinge covers.
These screws were really hard to remove. I suggest being VERY careful. They both stripped almost immediately and getting them out was nearly impossible. I'd suggest VERY carefully making sure that your driver bit fits before applying any force at all here. The first one I tried didn't work at all.
Thanks for advice.
Found them a bit hard to wiggle loose after getting the screws out - they seemed glued in. Was terrified of applying force, slipping and then breaking something, but I was okay. Left one was harder.I was able to use a S2 T4 bit that I found in a odd set that I have. It seems to work well on the ones that I have tried.
-
-
-
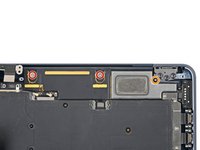
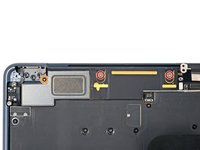
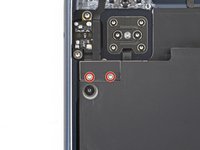
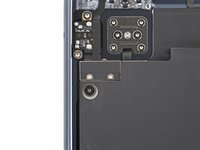
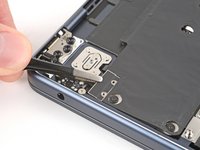
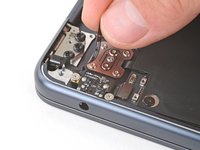
Remove the six screws securing the left and right speakers:
-
Four 5.6 mm 4IP Torx Plus screws (two on each speaker)
-
Two 3.5 mm T5 Torx screws (one on each speaker)
On the A2681 that I am working on, the Four 5.6mm (highlighted in red) were T3 screws, ( not T5 as noted as of 1/2/2025 )
Do not remove
-
-
-
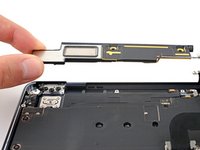
Lift the speakers straight up and remove them.
Do not remove
With the speakers installed the lid fouls on them and can't be removed. Maybe subtle differences between different units...
John McKee - 답글
-
-
-
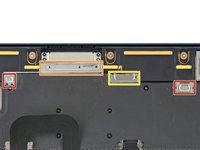
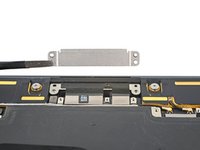
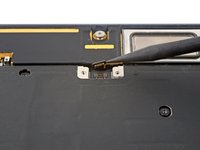
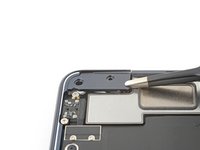
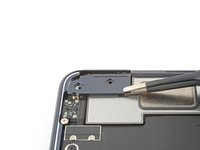
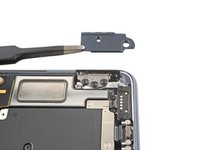
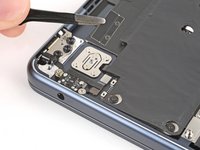
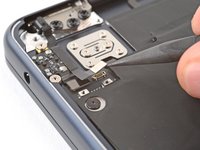
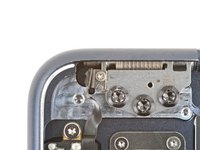
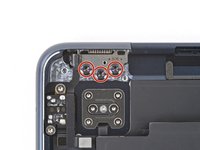
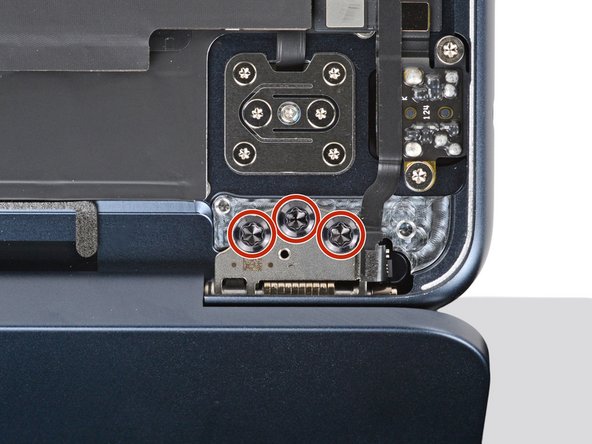
Use a T3 Torx screwdriver to remove the two 1.5 mm screws securing the lid-angle sensor connector cover.
-
-
-
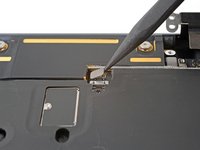
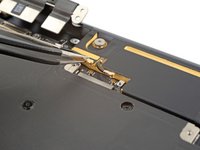
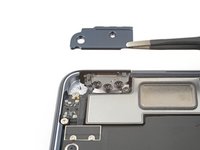
Use the point of a spudger to lift the flap covering the lid‑angle sensor screw, located on the left hinge.
-
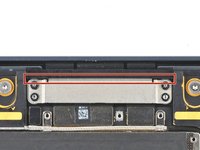
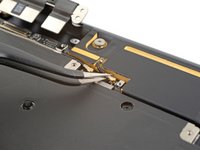
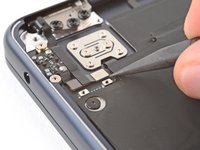
Use a 1IP Torx Plus driver to remove the screw securing the lid‑angle sensor.
-
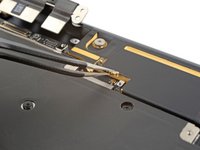
Remove the lid‑angle sensor and set it aside for reassembly.
-
-
-
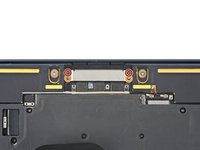
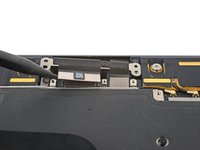
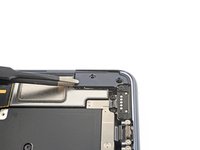
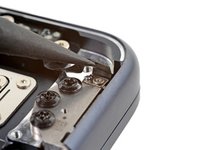
Use an 8IP Torx Plus driver to loosen (not remove) the six hinge screws.
-
-
-
Fully open your MacBook and gently place it keyboard side down on a table so the screen hangs over the edge.
Fully open the screen. I didn't first time, then had too. Small point, but if not fully open, it won't slide out.
Bonjour,
Super tuto, mais il manque l'étape du capteur d'angle à la fin. Ce n'est pas trop gênant et j'ai bien réussi le changement de mon écran...
Bravo et merci
Bonne journée
-
-
-
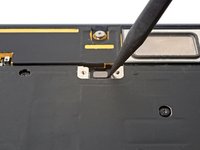
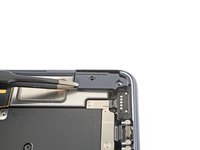
Support the screen with one hand and use your free hand to remove the six 4.3 mm 8IP Torx Plus screws securing the hinges.
-
-
-
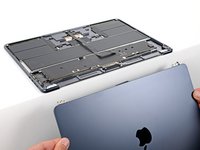
Hold the screen with both hands and lift the hinges out of their recesses to remove the screen.
-
Make sure the screen hinges are fully open and guide them into their recesses in the frame.
-
Install and partially tighten the eight hinge screws.
-
Close your laptop and make sure the screen is properly aligned. If it clicks or snaps, readjust the alignment.
-
Fully tighten the hinge screws.
-


Compare your new replacement part to the original part—you may need to transfer remaining components or remove adhesive backings from the new part before you install it.
To reassemble your device, follow these instructions in reverse order.
Take your e-waste to an R2 or e-Stewards certified recycler.
Repair didn’t go as planned? Try some basic troubleshooting or check out our Answers community for help.
다른 25명이 해당 안내서를 완성하였습니다.


댓글 28개
Does the screen display normally after replacing it with the aftermarket screen? As far as I know, after 2021, MacBooks have problems with screen output when they are replaced with aftermarket screens.
Hi! We tested swapping screens between two M2 MacBook Airs and didn't find any issues with the screen. The problem is with the MacBook Pros.
Is this doable without scratching or chipping the body if done using the ifixit tool kit?
Hello! It's definitely doable! If you're worried, I would take extra care when standing the laptop up to make sure you set it on a surface that won't scratch the body. Also, be careful when guiding the hinges out of the frame to avoid brushing against the frame.
Yes, unfortunately the true tone functionality will be lost even between two of the same devices.
500$ for the screen is too expensive :(( Can you replace it for me for free ? ;))
I'm having an issue with the screen angle. I had to replace screens on three MacBooks. One worked great and the other two didn't. It works fine if the screen angle is open less than 30°. Opening further than this disables the screen and touchpad.
Hi James! It sounds like there might be a problem with the lid-angle sensor. It might be folded in a weird way, at a strange angle, or damaged, causing the laptop to think it's closed when it's open. I would suggest taking the lower case off and checking the cable.
I've checked and reseated that cable. Tried another cable and no difference. If I put the original screen back on it works fine. It makes me think it has something to do with whatever actually transmits the angle to that cable. Is there a magnet or sensor in the hinges or screen itself? Is there a way to recalibrate it?
Unfortunately, the only way to recalibrate it is by going through Apple. I'm surprised it was still happening after trying a different cable. As for magnets or sensors, I can check tomorrow and get back to you.
Hi James, I checked the area of the laptop around the lid angle sensor with magnetic viewing film today and it looks like there's a magnet very close to the lid angle sensor on the frame near the power button. I didn't see anything on the screen.
I’m having an issue of “water marks” inside the screen, so my macbook got washed up in a rain and the water is going inside the screen, right now the condition is all functioning well, the water already dried up but it left a huge marks inside the screen. Is it doable to tear the screen and clean it up and reassembly it again, thanks
Hi! No,You need to get new display.Cheers
Very nice presentation!
Do you know if the Air 13" M2 and M3 display screens are interchangeable?
Thanks.
I have followed these instructions and installed the new screen. I turned it on and everything started to work. Then after about 5 minutes the screen went off and it stopped working again. I opened the bottom again, undid the screen connectors and redid them. The computer turned on again and then went off after a couple of minutes. Is there a trick to getting those connectors seated correctly?
Hi Samuel! Reconnecting press connectors can be tricky. Here's a guide that covers some general information about them. For larger connectors like the screen ones, press down on one side until it clicks into place, and then press down on the other side. Don't try pressing down in the middle.
With regards to the lid angle sensor. My T2 from the fixit Manta driver kit doesn't fit and there is not a T1 in the kit. I had to abandon the repair :(
Add this to your tool Kit! Precision T1 Torx Screwdriver, JAKEMY Professional Electronics Repair Screwdriver, Reinforced S2 Tool Steel
Any suggestions to diagnose a blank screen after install ? Cable seems seated well. Are there steps or connections that if not properly made will disable the display ?
The removal part went well. Would love tips for re-attaching the tiniest screws like the lid angle sensor. It was often pulled toward the magnetized hinge metal before I could seat it.
Angle position sensor. I noticed on new aftermarket they now have an adjustment on the side on the hinge to correct this issue.
Excellent guide - thank you! MacBooks are getting like phones these days in how tightly everything fits. I do think this was an easier swap than older MacBooks. Having the antennae cables and everthing go up through the middle is easier than the old unibodies.
Anyway, fitted a new screen for a friend - 200GBP - considerable saving over Apple's pricing!
take this out of the guide "lid angle sensor cable screw" you dont have to mess with that. matter of face speakers can all stay too smh
After replacing my screen, the machine no longer sleeps when I close the lid. Yes, I checked pmset. It seems like the lid angle sensor needs to be recalibrated (my replacement screen did not include a lid angle sensor). The official Apple guide says that I need to perform System Configuration after replacing the screen (https://support.apple.com/en-us/108333), but I am not able to follow the steps there after step 7 - instead it asks me something about an offline session.
For now at least I have a working screen which is good.
There is a lid angle sensor recalibration tool https://notebooknerds.de/en/nerd-tool-1/ which I will probably try next.