

Replacing the metal bottom case.
필요한 것
부품


도구


더보기...
-
-
Use your fingers to push both battery release tabs away from the battery and lift the battery out of the computer.
-
-
-
Remove the four identical Phillips 3.4 mm screws from the memory door. These screws have 4 mm diameter heads rather than the 3 mm heads on the body screws.
-
-
-
Remove the three Phillips screws in the battery compartment near the latch. Apple was nice enough to tilt these screws at a slight angle to make them easier to remove. On the A1261 these screws have 4 mm diameter heads rather than the 3 mm heads on the body screws.
-
-
-
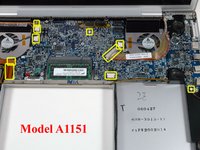
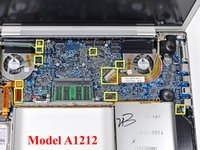
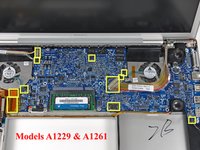
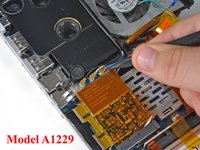
Disconnect the orange SuperDrive ribbon cable from the logic board, removing tape as necessary.
-
-
-
-
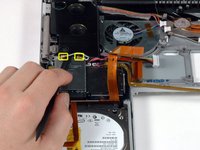
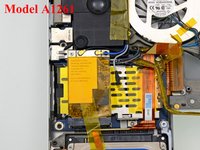
If the right speaker assembly remains attached to the logic board, hold the logic board with one hand and slide the speaker up slightly to free it from the logic board.
-
To properly reassemble your MacBook Pro, you'll have to clean off and replace the thermal compound from the three chips on the underside of the logic board. Use our Applying Thermal Paste Guide to prepare the processor and heat sink surfaces.
-
-
-
Remove the ten silver T6 Torx screws securing the display (five on each side). On the right a 9.6 mm screw secures the display data cable, also on the left the screw closest to the inside is 9.6 mm. The others are 7.8 mm.
-


To reassemble your device, follow these instructions in reverse order.
To reassemble your device, follow these instructions in reverse order.
다른 19명이 해당 안내서를 완성하였습니다.
