
Nexus 5X Headphone Jack Replacement

Use this guide to replace the headphone jack in your Nexus 5X.
You may need replacement adhesive to reattach components when reassembling the device.


-
-
Insert a SIM card ejection tool into the hole on the SIM card tray, located on the left edge of the phone.
-
Press in to eject the SIM card tray.
-
Remove the SIM card tray.
-
-
-
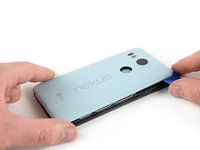
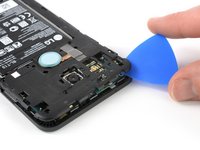
Place an opening pick in the opening of the SIM card tray slot and twist it sideways to release the first plastic clip that holds the rear panel in its place.
-
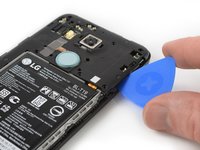
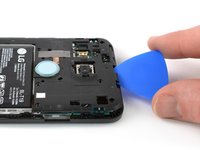
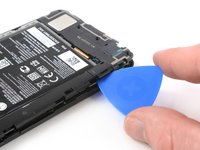
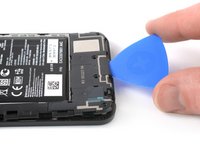
Slide the opening pick around the top edge of the phone to release the plastic clips that secure the rear panel.
-
-
-
-
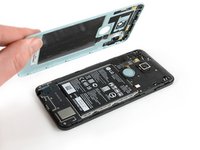
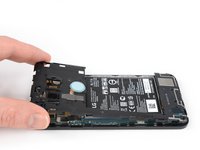
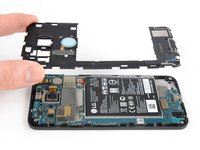
Use the edge of a spudger to pry up and disconnect the battery flex cable located at the bottom right of the motherboard.
-
-
-
Use an iOpener on the bottom front of the screen for about 30 seconds to loosen the adhesive beneath the headphone jack.
-


To reassemble your device, follow these instructions in reverse order.
Apply new adhesive where it’s necessary.
Repair didn’t go as planned? Check out our Nexus 5X Answers community for troubleshooting help.
To reassemble your device, follow these instructions in reverse order.
Apply new adhesive where it’s necessary.
Repair didn’t go as planned? Check out our Nexus 5X Answers community for troubleshooting help.
다른 한 분이 해당 안내서를 완성하였습니다.

