이 번역은 원본 안내서의 최신 업데이트를 반영하지 않을 수 있습니다. 번역 업데이트를 돕거나 아니면 원본 안내서 보기를 참조하세요.
소개
이 안내서를 따라서 Nintendo Switch Lite에서 닳고 성능이 저하된 배터리를 교체하세요.
Switch Lite는 JIS 나사를 사용하지만 필요한 경우 십자 드라이버를 사용할 수 있습니다. 나사가 벗겨지지 않도록 각별히 주의하세요. iFixit의 Phillips 비트는 JIS 스타일 나사와 교차 호환되도록 설계되었습니다.
안전을 위해서, Switch를 분해하기 전에 배터리를 25% 이하로 방전하세요. 이는 수리 도중 실수로 배터리를 손상할 때 일어날 수 있는 열 화재 위험을 줄일 수 있습니다. 배터리가 부풀어 올랐다면, 적절한 예방 조치를 취하세요.
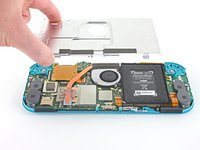
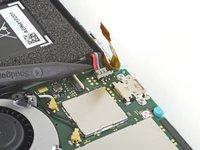
참고: 이 단계는 방열판에 붙어있는 실드 플레이트를 분리하는 것이 필요합니다. 실드 플레이트를 재설치하기 전에 열 페이스트를 닦아내고 방열판에 다시 바르는 것이 필요합니다.
필요한 것
-
이 단계에 사용된 도구:Magnetic Project Mat$19.95
-
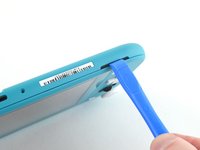
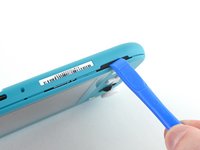
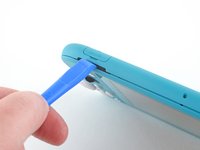
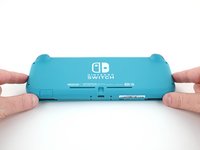
Y00 스크루드라이버를 사용하여 후면 패널을 고정하는 6.3mm-길이 나사 네 개를 풀어주세요.
-
-
-
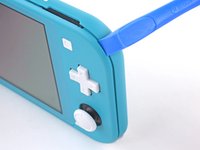
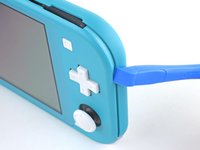
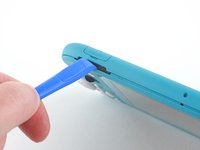
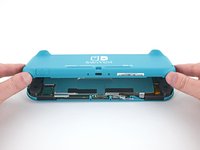
JIS 000 드라이버 또는 공식 iFixit PH 000 드라이버를 사용하여, 후면 패널을 고정하고 있는 다음 나사들을 풀어주세요:
-
기기 상단의 3.6mm-길이 나사 두 개
-
기기 하단의 3.6mm-길이 나사 두 개
-
-
-
-
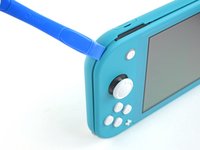
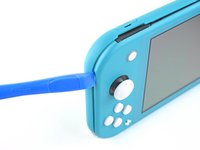
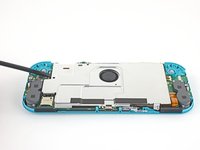
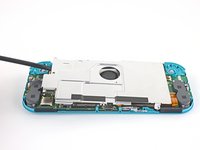
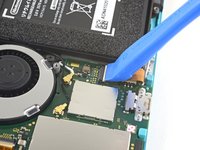
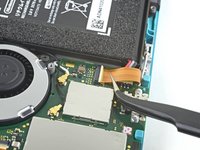
JIS 000 또는 공식 iFixit PH 000 드라이버를 사용하여 다음 나사 네 개를 풀어주세요:
-
3.1mm 나사 세 개
-
4.5mm 나사 한 개
-
-
이 단계에 사용된 도구:iFixit Adhesive Remover$19.99
-
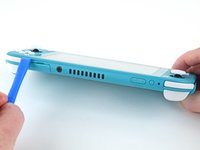
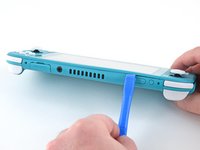
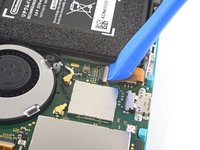
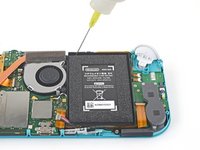
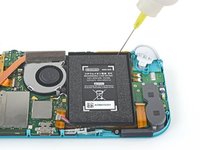
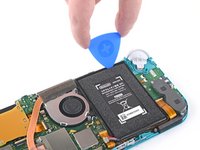
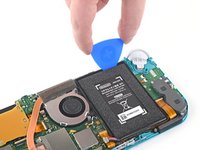
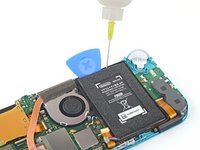
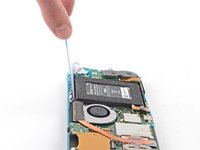
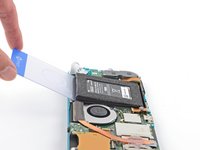
상단 가장자리를 따라서 배터리 웰 내부에 접착제 제거제 또는 고농도 (90% 이상) 이소프로필 알코올을 몇 방울 발라서 접착제를 약하게 하세요.
-
-
이 단계에 사용된 도구:Microfiber Cleaning Cloths$3.99
-
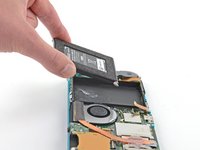
새 배터리를 설치하기 전에 접착제 제거제 또는 이소프로필 알코올과 극세사 천을 사용하여 배터리에 남아 있는 접착제를 깨끗이 닦아주세요.
-
새 배터리에 사전-설치된 접착제가 제공되지 않는 경우, 배터리 하단에 이 안내서를 따라서 미리-자른 접착제를 설치하세요.
-


기기를 재조립하려면, 이 지침들을 역순으로 따르세요.
최적의 성능을 위하여, 이 안내서를 완료한 후 새로 설치한 배터리를 교정하세요.
전자 폐기물을 R2 또는 e-Stewards 인증 재활용 센터로 가져가세요.
수리가 계획대로 진행되지 않았습니까? 자사의 기본 문제 해결 또는 Nintendo Switch Lite 답변 커뮤니티에서 확인하세요.
기기를 재조립하려면, 이 지침들을 역순으로 따르세요.
최적의 성능을 위하여, 이 안내서를 완료한 후 새로 설치한 배터리를 교정하세요.
전자 폐기물을 R2 또는 e-Stewards 인증 재활용 센터로 가져가세요.
수리가 계획대로 진행되지 않았습니까? 자사의 기본 문제 해결 또는 Nintendo Switch Lite 답변 커뮤니티에서 확인하세요.
다른 40명이 해당 안내서를 완성하였습니다.
다음 번역가들에게 특별히 감사 드립니다:
90%


이 번역인들은 저희가 세상을 수리하는 데 도움을 주고 있어요! 기여하시겠습니까?
번역 시작하기 ›

댓글 27개
Hello!
I am preparing to repair my daughters nintendo switch light. It has stopped charging out of no where. I have all the tools, I just can't find the battery anywhere. Where would you recommend buying it from?
If you are still looking Ifixit sells one themselves Nintendo Switch Lite Battery
Thanks for the guide. Battery replacement kits are now available on Amazon: https://www.amazon.com/Nintendo-HDH-001-... (they weren’t in November! I was also looking for this during that time)
Unfortunately, the battery was much harder to remove than I expected. I did use a lot of isopropyl alcohol, but the adhesive they use really was giving me a lot of trouble. I should’ve wisened up and googled other adhesive removal methods or tried a new approach other than prying with the spudgers.
Well, now the LCD now has what looks like pressure damage in the bottom left where I’d imagine a lot of the prying pressure went. It is much more noticeable when the screen goes all-white, and not too bad with darker colors.
I don’t blame iFixit for my mistake of course, and it is really disappointing that Nintendo used the amount of adhesive that they did. But I hope this comment can serve as a warning to others attempting this repair to be more gentle even if it’s refusing to come off.
Yikes! Sorry to hear this. How did you pry with the spudger exactly? If you kept it around the top edge of the battery well then I would assume it wouldn’t damage the screen, but if you inserted the end of the spudger deeper in the battery well and used that point as the fulcrum, then I could see that putting a lot of pressure on the back of the LCD.
@craiglloyd I did an embarrassing amount of spudger prying pretty much everywhere along the top/bottom of the battery, I actually broke a few spudger tips in the process so that might reveal something about my approach…
But, I’m starting to think it may not be LCD damage after all, but rather some isopropyl alcohol caught behind the screen– During my prying, the Switch case was getting pretty heavily warped, so maybe some of the alcohol (that I definitely used in excess) slipped in and got sandwiched under the screen? I started to notice this since the blotches seem like they’ve moved over time. Here’s an image of the screen now https://imgur.com/DjYmFnJ (and the dark gray blotch along the leftside isn’t a shadow, white spots in bottom left I thought were pressure damage)
It’s still very usable / not noticeable on black colors and thanks again for the guide! I can give the screen more time to see if it improves at all, or maybe try going back in and trying to see it is trapped alcohol that can be released
vmgm -