소개
환영합니다! 컨트롤러의 배터리가 예전만큼 오래 지속되지 않거나 전혀 작동하지 않습니까? Nintendo Switch Pro 컨트롤러의 배터리를 교체하고 싶으면 제대로 찾아 오셨습니다! 아래에 컨트롤러의 배터리 교체 지침이 있습니다. 지침을 주의 깊게 읽고 1에서 6까지 순서대로 단계를 따르세요.
Switch Pro Controller는 JIS 나사를 사용합니다. Phillips/십자 드라이버를 사용하여 풀면 나사가 벗겨질 수 있으므로 사용하지 마세요.
참고: 제대로 동기화되지 않은 Switch Pro 컨트롤러는 제대로 충전되지 않습니다. 배터리에 결함이 있어 교체가 필요한지 확인하려면 먼저 컨트롤러를 다시 동기화하고 나서 전원이 연결된 상태에서 Switch 컨트롤러 메뉴에서 제대로 충전되고 있는지 확인하세요.
주의: 부풀어 오른 배터리를 취급할 때는 최대한 주의를 기울여야 합니다. 부풀어 오른 배터리 식별, 처리, 취급 및 폐기 방법에 대한 정보는 아래 링크를 참조하세요.
필요한 것
-
-
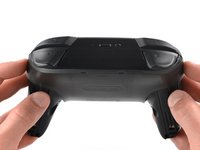
모델 스티커가 천장을 향하도록 컨트롤러를 뒤집으세요.
-
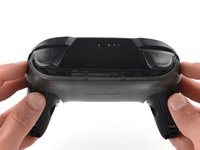
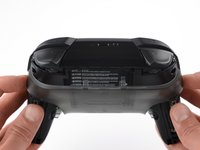
JIS #00 스크루드라이버를 사용하여 손잡이 끝에 손잡이를 고정하는 검정색 8.4mm 나사 2개를 풀어주세요.
-
-


기기를 재조립하려면 이 지침들을 역순으로 따르세요.
최적의 성능을 위하여 이 안내서를 완료한 후 새로 설치한 배터리를 교정하세요.
전자 폐기물을 R2 또는 e-Stewards 인증 재활용 센터로 가져가세요.
기기를 재조립하려면 이 지침들을 역순으로 따르세요.
최적의 성능을 위하여 이 안내서를 완료한 후 새로 설치한 배터리를 교정하세요.
전자 폐기물을 R2 또는 e-Stewards 인증 재활용 센터로 가져가세요.
다른 37명이 해당 안내서를 완성하였습니다.
다음 번역가들에게 특별히 감사 드립니다:
100%


이 번역인들은 저희가 세상을 수리하는 데 도움을 주고 있어요! 기여하시겠습니까?
번역 시작하기 ›

팀

Cal Poly, Team S11-G2, Regan Fall 2019 Cal Poly, Team S11-G2, Regan Fall 2019 회원
CPSU-REGAN-F19S11G2
5 회원들
안내서 43개를 작성함
댓글 12개
easy peasy only have to recycle battery
Where can I buy genuine ctr-003 batteries in germany/europe?
You can buy them directly in the iFixit Europe or in your case in the Germany store.
Guide facile à suivre et rapide à exécuter. Merci!
Thanks for sharing this "how to" guide. Upon replacing my battery I realize that there was a malfunctioning into the USB-C port which was not charging batteries through the controller port. I'm writing this in order to alert some people that the problem with batteries been depleted can be related to charging issues. Check it before replacing batteries! =)
The battery says to charge it to 100% + 2 hours and then use the controller so that it uses up the entire battery and then charge to 100% again. If you're not playing Nintendo for hours, how do you use up the battery in the controller?
Be carefull, these screws are super easy to strip even with the right tools.
Lukas Eberharter - 답글
I tried editing these instructions after I had trouble with stripping screws, but it doesn't seem to take. The issue is that these are JIS and not Phillips screws. They are VERY similar looking but a Phillips head screwdriver will strip the screws.
Isaac Webb - 답글
I tried using a Philips #00 screwdriver but it didn’t work
vincent ingrassia - 답글
Don't even think about trying Phillips. There are some other guides online that say you'll be fine, but they're wrong. Even one attempt with Phillips WILL strip these, and you will never, ever get this controller open once that happens. Even with JIS they're really hard to get out and really easy to strip.
Luke T. Allen - 답글