소개
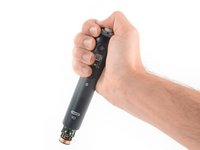
Use this guide to replace a worn-out or dead battery in your Oral-B iO.
If your battery is swollen, take appropriate precautions. For your safety, discharge your battery below 25% before disassembling your toothbrush. This reduces the risk of a dangerous thermal event if the battery is accidentally damaged during the repair.
You’ll need the charging station of the Oral-B iO during the battery removal procedure.
필요한 것
-
-
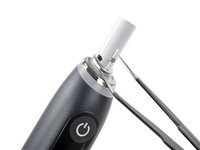
Flip the charging station of your Oral-B iO upside down.
-
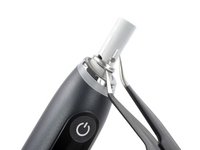
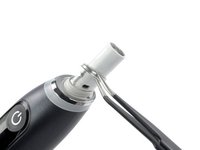
Align the three recesses on the iO's silver bottom cap with the notches at the bottom of the charging station.
-
Push the toothbrush into the charging station with mild pressure and turn it about 90° counter clockwise to unlock the thread of the bottom cap.
 FixBot에 문의하기
-
-
-
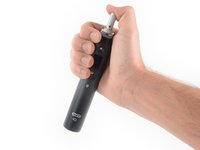
Unscrew the bottom cap of your toothbrush.
-
Remove the bottom cap.
-
-
-
이 단계에 사용된 도구:Tweezers$4.99
-
Insert one arm of a pair of tweezers or a small flathead screwdriver underneath the bottom edge of the metal ring sitting above the grey rubber gasket.
-
Use your tool to carefully pry up the metal ring.
-
-
-
Use a pair of tweezers or your finger to remove the metal ring.
-
-
-
Remove the brush head from your toothbrush.
-
Hold the toothbrush body in one hand and use your thumb to press down the top of the toothbrush assembly.
-
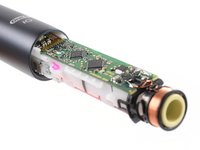
Pull the toothbrush assembly out of the opening at the bottom end of the toothbrush body.
-
-
-
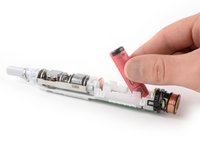
Pull the battery out of its recess on the bottom of the toothbrush assembly.
-
Remove the battery.
-


If possible, turn on your toothbrush and test your repair before resealing.
Take your e-waste to an R2 or e-Stewards certified recycler.
Repair didn’t go as planned? Try some basic troubleshooting, or ask our Answers community for help.
다른 124명이 해당 안내서를 완성하였습니다.


86가이드 댓글
My toothbrush got knocked over on the counter and it started doing this weird loop of booting but not going into the menu, and doing and doing it. Until it shows the battery is at 0%. Just ordered the battery and hopefully that was just the issue and that the knocking over was just coincidental. I opened it up and no parts just randomly fell out and checked the circuit board it and nothing looked like it got knocked out of place.
Albion Ong - 답글 공유