소개
Upgrade your hard drive for an instant increase in storage space.
필요한 것
-
-
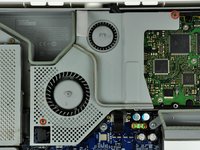
Lay the iMac display-side down on a flat surface.
-
Loosen the three Phillips screws securing the rear panel to the iMac.
-
-
-
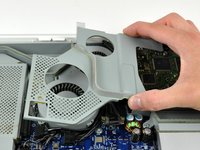
Remove the two Phillips screws securing the fan cover to the midplane.
-
Lift the fan cover up off midplane.
-
-
-
-
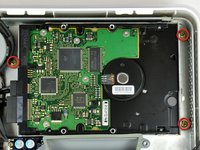
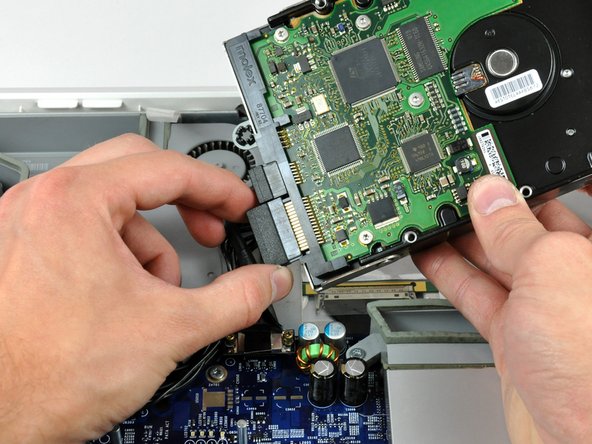
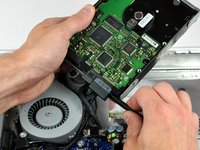
Disconnect the hard drive thermal sensor cable from the hard drive thermal sensor.
-
-
-
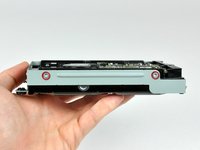
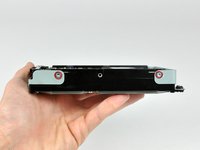
Remove the two T10 Torx screws from both sides of the hard drive (four screws total).
-


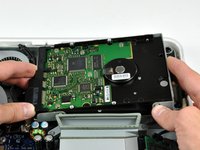


To reassemble your device, follow these instructions in reverse order.
다른 140명이 해당 안내서를 완성하였습니다.

5가이드 댓글
I can't imagine why this disassembly is called "moderate." This has to be one of the easiest Macs to open up and gain access. Interestingly, the very next model, the 1144, is one of the most difficult and painful macs (that I know) to open up for access to the most rudimentary parts (drive and memory). The designers of the 1144+ iMacs should all be taken outside and shot!
Maybe the Quadra 700 is easier - no tools required! Or the G4 and G5 towers. Dunno about the later ones...
Awesome, thanks for helping me breathe life back into my G5, it's going to become the band computer for storing videos/recordings, as well as some mastering and whatnot.
Thank you. This was fast and without pains. Now I will be able now to recover the information from a computer that did not worked at all.
Sergio Dore - 답글 공유
This was great in helping me resuscitate my old iMac G5 and upgrade it in the process! Part of my searching for assistance revolved around what to do with the thermal sensor (mine was attached to the dead hard drive itself rather than the hard drive bracket). Luckily for me, your clear photos helped me determine I could simply pry up the thermal sensor and reattach it elsewhere (like to the hard drive bracket as depicted). Thanks!