이 버전에는 잘못된 편집 사항이 있을 수 있습니다. 최신 확인된 스냅샷으로 전환하십시오.
필요한 것
-
-
분해를 시작하기 전에 iPhone 전원을 끄세요.
-
iPhone 하단 가장자리에 위치한 3.4mm pentalobe/펜타로브/별나사 두 개를 빼세요.
-
-
-
파란색 손잡이를 뒤로 당겨 안티-클램프의 팔을 잠금 해제하세요.
-
팔을 휴대폰의 왼편 또는 오른편 가장자리 위로 밀어 주세요.
-
흡입 컵을 휴대폰의 하단 가장자리 홈 버튼 근처에 배치하세요—전면에 하나, 후면에 하나.
-
적절한 위치에 컵을 함께 꽉 쥐고 흡착하세요.
-
-
-
iOpener를 가열하여 안티-클램프의 팔에 끼워 넣습니다.
-
iPhone 하단 가장자리에 놓이도록 iOpener를 접으세요.
-
접착제가 풀려서 틈이 생길 때까지 1분 정도 기다리세요.
-
틈에 여는 픽을 끼우세요.
-
다음 세 단계는 건너뛰세요.
-
-
-
iPhone 하단 가장자리를 가열하면 디스플레이를 고정하고 있는 접착제가 부드러워져서 보다 쉽게 열 수 있습니다.
-
헤어 드라이어 또는 iOpener를 준비하여 iPhone 하단 가장자리를 약 90초 동안 가열하여 밑에 있는 접착제를 부드럽게 합니다.
-
-
-
-
하단 디스플레이 케이블 브래킷을 로직 보드에 고정하는 다음 삼-점 Y000 나사 네 개를 분리하세요:
-
1.2mm 나사 세 개
-
2.6mm 나사 한 개
-
-
이 단계는 번역되지 않았습니다. 번역을 도와주십시오
-
Remove the five Phillips screws securing the earpiece speaker bracket:
-
Two 1.8 mm screws
-
One 2.3 mm screw
-
One 2.4 mm screw
-
One 2.8 mm screw
-
-
이 단계는 번역되지 않았습니다. 번역을 도와주십시오
-
Use the flat end of a spudger to lift the front-facing camera from its housing.
-
Gently bend the camera ribbon cable to the side to clear the way to the earpiece speaker underneath.
-
-
이 단계는 번역되지 않았습니다. 번역을 도와주십시오
-
Gently fold the camera and attached ribbon cable toward the bottom of the iPhone to allow access to the components underneath.
-
-
이 단계는 번역되지 않았습니다. 번역을 도와주십시오
-
Slide a spudger under the ambient light sensor flex cable, and lift the sensor out of its housing.
-
-
이 단계는 번역되지 않았습니다. 번역을 도와주십시오
-
Slide the tip of a spudger underneath the proximity sensor flex cable, and lift the sensor out of its housing.
-
-
이 단계는 번역되지 않았습니다. 번역을 도와주십시오
-
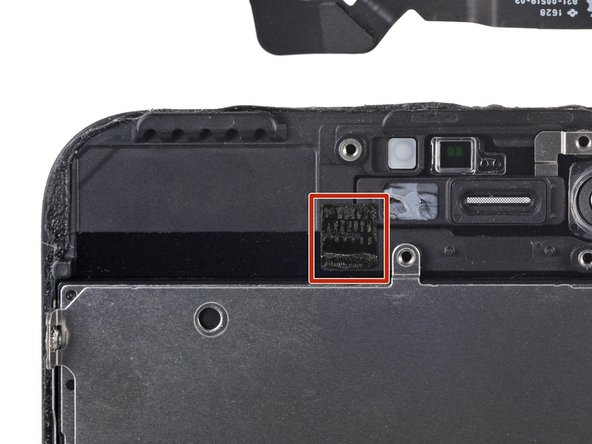
Insert the sharp edge of an iFixit opening tool underneath the camera assembly's flex cable, on the opposite side from the front-facing camera.
-
Pry up to separate the edge of the flex cable from the back of the display.
-
-
이 단계는 번역되지 않았습니다. 번역을 도와주십시오
-
Insert the point of a spudger underneath the same portion of the flex cable that you separated in the previous step.
-
Continue separating the remainder of the flex cable, pushing the spudger toward the row of circular gold earpiece speaker contacts.
-
-
이 단계는 번역되지 않았습니다. 번역을 도와주십시오
-
Continue using your spudger to carefully separate the last of the flex cable from the back of the display.
-
-
이 단계는 번역되지 않았습니다. 번역을 도와주십시오
-
Remove the front camera and sensor cable assembly.
-
A piece of black double-sided insulating tape lies between the display and three rows of copper contacts on the back of the camera/sensor cable. It may remain stuck to the display, or it may come off with the cable.
-


다른 113명이 해당 안내서를 완성하였습니다.


댓글 17개
Do I have to do this if i buy a new phone screen or do they usually come with one?
If this Speaker is Not Working or it has any Noise Issues, Apple will Replace whole Front Display Section. Under their Policy, they won’t repair it. Neither Fully Replace your iPhone, only Front Panel Replacement.
macktm -
Does 7 and 7plus has the same camera/sensor strip?
No, it’s a bit different.
The spacing between the metal dots for the earspeaker isn’t there on the 7+ model, but is on the 7.
Anybody got a solution to earpiece not working after ribbon swap?
Seems to be mega common with this repair. I’ve heard a few ideas but nothing concrete. More advice about this issue would be greatly appreciated by me and a bunch of people.