이 버전에는 잘못된 편집 사항이 있을 수 있습니다. 최신 확인된 스냅샷으로 전환하십시오.
-
-
분해를 시작하기 전에 iPhone 전원을 끄세요.
-
iPhone 하단 가장자리에 위치한 3.4mm pentalobe/펜타로브/별나사 두 개를 빼세요.
-
-
-
파란색 손잡이를 뒤로 당겨 안티-클램프의 팔을 잠금 해제하세요.
-
팔을 휴대폰의 왼편 또는 오른편 가장자리 위로 밀어 주세요.
-
흡입 컵을 휴대폰의 하단 가장자리 홈 버튼 근처에 배치하세요—전면에 하나, 후면에 하나.
-
적절한 위치에 컵을 함께 꽉 쥐고 흡착하세요.
-
-
-
iOpener를 가열하여 안티-클램프의 팔에 끼워 넣습니다.
-
iPhone 하단 가장자리에 놓이도록 iOpener를 접으세요.
-
접착제가 풀려서 틈이 생길 때까지 1분 정도 기다리세요.
-
틈에 여는 픽을 끼우세요.
-
다음 세 단계는 건너뛰세요.
-
-
-
iPhone 하단 가장자리를 가열하면 디스플레이를 고정하고 있는 접착제가 부드러워져서 보다 쉽게 열 수 있습니다.
-
헤어 드라이어 또는 iOpener를 준비하여 iPhone 하단 가장자리를 약 90초 동안 가열하여 밑에 있는 접착제를 부드럽게 합니다.
-
-
-
하단 디스플레이 케이블 브래킷을 고정하는 다음 길이의 삼-점 Y000 나사 네 개를 분리하세요:
-
1.2mm 나사 세 개
-
2.4mm 나사 한 개
-
-
-
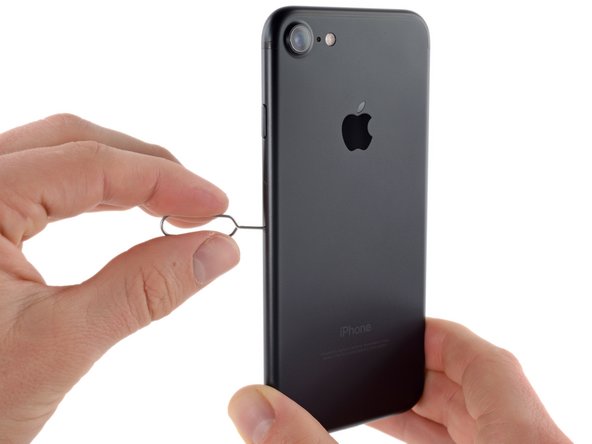
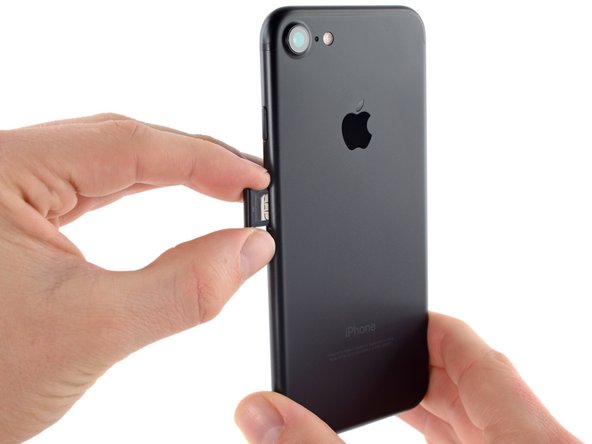
SIM 카드 추출 도구 또는 종이클립을 SIM 카드 트레이 작은 구멍에 넣으세요.
-
눌러서 트레이를 튀어나오게 하세요.
-
iPhone에서 SIM 카드 트레이 어셈블리를 빼세요.
-
-
-
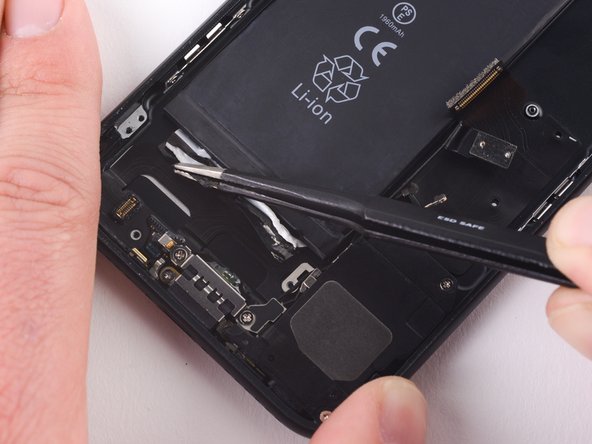
이 단계는 번역되지 않았습니다. 번역을 도와주십시오
-
Use the flat end of a spudger to disconnect the Taptic Engine connector from its socket on the logic board.
-
-
이 단계는 번역되지 않았습니다. 번역을 도와주십시오
-
Remove the three 1.6 mm Phillips screws securing the Taptic Engine to the rear case.
-
-
이 단계는 번역되지 않았습니다. 번역을 도와주십시오
-
Use a pair of tweezers with blunt tips to peel back one of the adhesive strips on the lower edge of the battery.
-
-
이 단계는 번역되지 않았습니다. 번역을 도와주십시오
-
Use a pair of tweezers with blunt tips to peel back the other adhesive strip on the lower edge of the battery.
-
-
이 단계는 번역되지 않았습니다. 번역을 도와주십시오
-
Slowly pull one battery adhesive tab away from the battery, toward the bottom of the iPhone.
-
Pull steadily, maintaining constant tension on the strip until it slips out from between the battery and the rear case. For best results, pull the strip at a 60º angle or less.
-
-
이 단계는 번역되지 않았습니다. 번역을 도와주십시오
-
Repeat the previous step for the second strip.
-
If you removed both adhesive strips successfully, skip the next step.
-
Otherwise, if either of the adhesive strips broke off underneath the battery and could not be retrieved, continue with the next step below.
-
-
이 단계는 번역되지 않았습니다. 번역을 도와주십시오
-
Prepare an iOpener and apply it to the back of the rear case, directly over the battery. Alternatively, you can apply heat using a heat gun or hair dryer.
-
After about a minute, remove the iOpener, flip the phone over and use a plastic card to break up any remaining adhesive behind the battery.
-
-
-
다음 Phillips/십자 나사들을 분리하세요.
-
전원 버튼을 고정하는 1.9mm 나사 두 개.
-
음량 버튼을 고정하는 2.3mm 나사 세 개.
-


기기를 다시 조립하려면 위의 단계를 역순으로 따르세요.
기기를 다시 조립하려면 위의 단계를 역순으로 따르세요.
다른 34명이 해당 안내서를 완성하였습니다.
다음 번역가들에게 특별히 감사 드립니다:
100%

Christian Kim님은 저희가 세상을 수리하는데 동참하신 분입니다! 기여하시겠습니까?
번역 시작하기 ›

댓글 8개
Hello,
how can I disassemble and assemble the mute button from the flex cable. because most spare part cables are without mute button…
thanks
the mute button can slide out. there is space on the side that is not marked red. it looks like three clips hold it in but simply grab hold of the button nob thing with tweezers and slide or wedge it out from underneath that bar that goes around the side with the red line and then once it’s out you can slip that button into the new flex
hahaha aqint that the truth LOL
After reinstalling the volume and power buttons and brackets & clips, my power button won’t turn phone off/on; my volume control seems possessed and does what it wants, lol. Help!