Before you begin to open up your device, make shure that your hands are clean, that the table is clean, and most of all, if you are working on a electronics board, be shure that you ware a wristwrap, that its securely plugged in to a good ground source, ans that the wristwrap is touching the skin, a microchip is very sensitive to a ESD shock (Electro-Magnetic-Discharge), if you are lucky, the chip dies instantly, but if you don't, you probably just "wounded" the chip, it means it will work, but its doomed to fail in the feild later on. Be very carefull, don't just open ANY device, without securing yourself!

-
-
Since this should be an easy teardown, i will have more time to take you through every step, i will take the time to tell you wat each part is and what is does, i assume that you ware a wristwrap, if you don't, i am not responsible for any kind of ESD damage that you may give to a part or you're device!
-
The first picture is the front, you see that, even this phone, does have a color screen, they are very specific and they are hard to get, if you need to find one of these, its better to buy the same phone and make a frankenstein build, because this phone does have build in memory for phone numbers etc, and that is the purpose of this guide
-
-
-
FIRST, MAKE SHURE YOU SHUT THE PHONE DOWN! You can take the back cover off by sliding the cover away from the top side, if the LED light is facing you, slide the cover away from you, then just lift the battery out
-
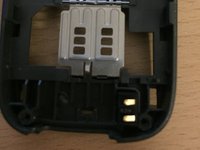
If the battery is out, lift the litle metal piece UP to remove the sim card. Be carefull not to break anything of the phone.
-
Let's go to the next step.
-
-
-
-
Now its time to grab a Torckx (star shaped) T6 screwdriver before we continue, because in the next step you will need it.
-
Now its time to remove the front cover, its easy but tricky at the same time, you put the upper side on the table,
-
The charger/usb/headphone side should be facing you, now you need a little bit of force and your finger nails, pull the front cover away from the main unit until you hear a loud click. It should look as showen on the first picture of this step
-
Now all the screws that are holding the unit toghether should now all be visible
-
There should be 2 above the LCD screen, 2 under the LCD screen, and 2 under the keypad, on the bottomside of the phone.
-
Lets go to the next step
-
-
-
Now take you're screwdriver, and remove those 6 screws you did see in the previous step.
-
Be carefull when you remove the last screw, hold the display assembly in the unit with a finger.
-
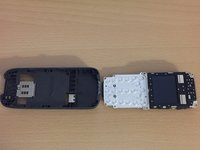
Now you can take out the entire display assembly that is attached to the main board.
-
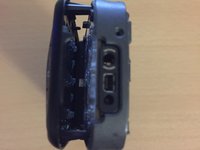
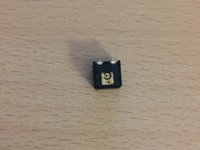
I take you through the display assembly in the next step, because in the shell that houses the entire display assembly, you see a piece with 2 golden feet on it.
-
That is the microphone, and can be replaced with any microphone of the same type
-
Lets go to the next step
-
-
-
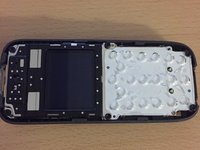
When you take the display assembly and you flip it over with the display facing the table, you would see something like showen in the picture.
-
First, you need to remove the antenna housing from the unit, this is very easy to lift away from the display assembly as it is just slightly holding with a very little amound of glue. The antenna housing is the lila part showen in the picture, the antenna housing also houses the polyphonic speaker, you can remove that speaker also to change it.
-
You can remove this speaker with you're Torckx T6 screwdriver, its just held in with glue, its easy to lift it out of its casing.
-