소개
This repair guide was authored by the iFixit staff and hasn’t been endorsed by Google. Learn more about our repair guides here.
Follow this guide to open up the Pixel XL to remove and replace its battery. If your battery is swollen, take appropriate precautions.
Before disassembling your phone, discharge the battery below 25%. The battery can catch fire and/or explode if accidentally punctured, but the chances of that happening are much lower if discharged.
The Pixel XL’s unreinforced display panel is fragile and is attached to the frame with strong adhesive, making repairs difficult. There is a considerable chance of breaking the display, especially if it already has micro-fractures. Be sure to apply plenty of heat and be extremely careful during the prying stage.
The battery is held in place by very strong adhesive. You may need to use high concentration (over 90%) isopropyl alcohol in order to loosen the battery from the phone.
필요한 것
-
-
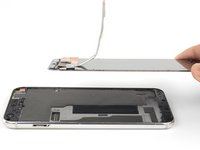
Heat an iOpener and apply it to the top edge of the display for two minutes.
-
Take note of the following regions before you begin prying:
-
Thin adhesive lined against the display panel
-
Thick adhesive
-
The OLED display panel, which is very prone to damage
-
The display cable, which can be damaged during prying
 FixBot에 문의하기
-
-
-
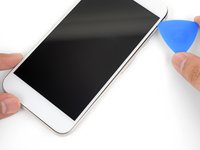
Once the edge is warm to the touch, apply a suction cup close to the edge.
-
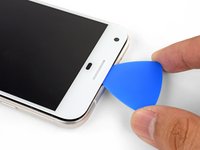
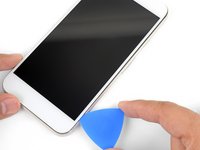
Lift on the suction cup, and insert an opening pick into the gap.
-
If you have trouble creating a gap, reheat the edge and try again.
-
-
-
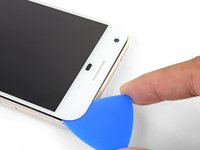
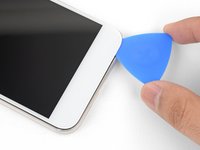
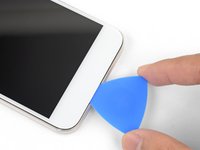
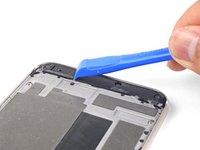
Slide the opening clip across the top edge to slice through the adhesive.
-
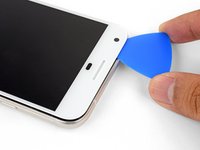
Leave an opening pick in the edge to prevent the adhesive from resealing.
-
-
-
Heat an iOpener and apply it to the right edge of the phone for two minutes.
-
Insert an opening pick near the top edge of the phone, where you have already sliced the adhesive.
-
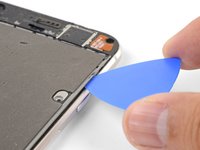
Slowly guide the pick around the right corner.
-
Carefully slide the pick down the right edge of the phone to slice through the adhesive.
-
Repeat the step for the left edge of the phone.
-
-
-
Heat the bottom edge with an iOpener for two minutes.
-
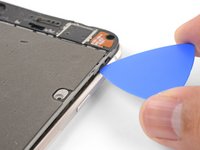
Insert a pick near the right edge where you have already loosened the adhesive.
-
Carefully guide the pick around the corner.
-
Slide the pick along the bottom edge to slice through the adhesive.
-
-
-
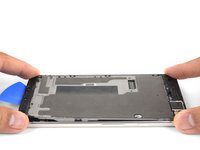
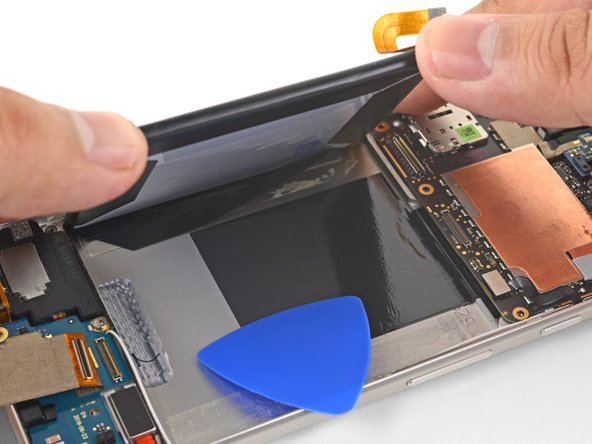
Once you have sliced around the perimeter of the phone, carefully lift the display assembly up slightly by the right corners.
-
Use an opening pick to slice through any remaining adhesive.
-
-
-
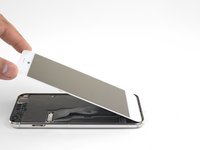
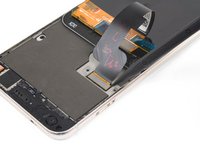
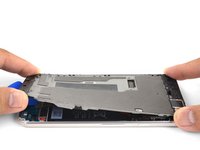
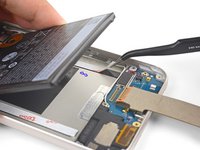
Lift the display assembly from the top end and swing it around such that it rests upside down on the frame.
-
-
이 단계에 사용된 도구:Magnetic Project Mat$19.95
-
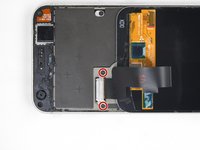
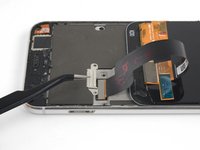
Remove the two 4 mm T5 screws securing the display cable bracket.
-
Remove the display cable bracket.
-
-
-
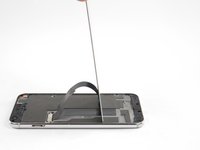
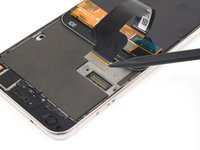
Use the point of a spudger to pry up and disconnect the display cable from its connector.
-
-
-
-
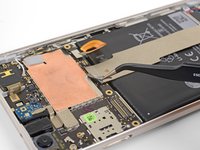
Remove the following screws that secure the midframe to the back:
-
Seven black 4 mm T5 screws
-
Two silver 3 mm T5 screws
-
-
-
The midframe is held tightly in place by plastic clips which push into the edge of the back case.
-
-
-
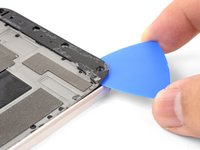
Find the small notch in the bottom left corner of the frame and insert an opening pick.
-
Slide the opening pick along the bottom edge of the phone towards the bottom right corner and leave it there.
-
-
-
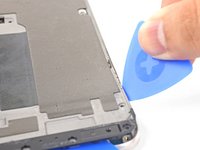
Insert a separate opening pick into the right edge of the phone, near the bottom.
-
Slowly push the pick upwards along the seam until the first clip pops free.
-
Once you've released the clip, leave the opening pick in place to prevent the midframe from resealing.
-
-
-
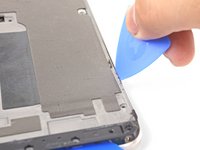
Insert an opening pick into the right edge of the phone and slide it upwards towards the top right clip.
-
Slowly slide the pick past the clip to disengage it from the frame.
-
-
-
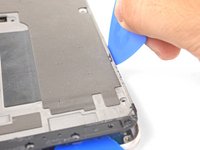
Grasp the right edge of the midframe by the corners and slowly hinge the edge up.
-
When the left edge feels loose, stop hinging and lift the midframe upwards.
-
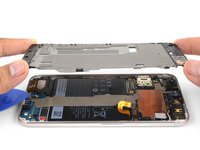
Remove the midframe.
-
-
-
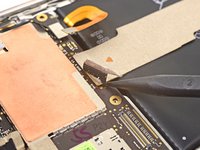
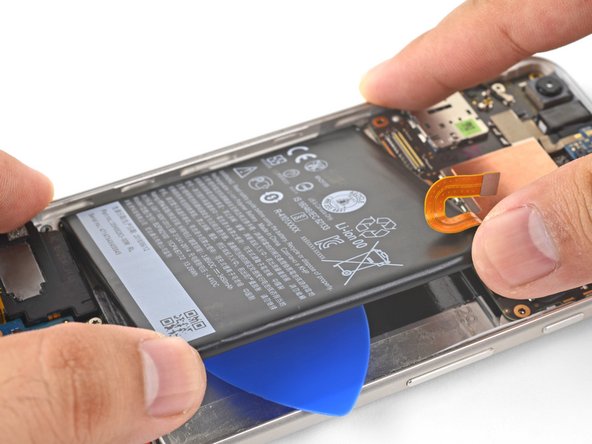
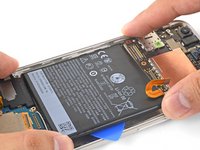
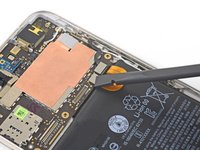
Use the point of a spudger to pry up and disconnect the battery connector.
-
Bend the battery flex cable slightly so that it will not accidentally touch the motherboard.
-
-
이 단계에 사용된 도구:Tweezers$4.99
-
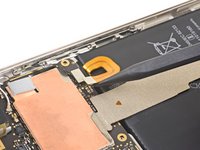
Use tweezers to peel up the tape at the top of the interconnect cable.
-
-
-
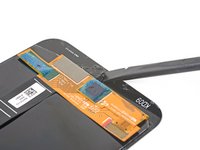
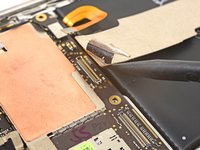
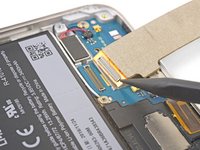
Use the point of a spudger to pry up and disconnect the interconnect cable from the motherboard.
-
-
-
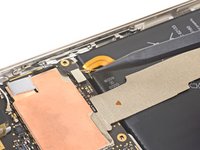
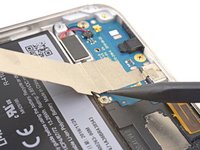
Use the point of a spudger to pry up and disconnect the interconnect cable from the bottom daughterboard.
-
-
-
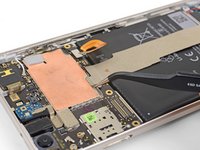
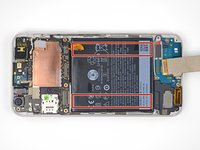
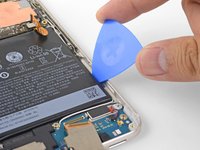
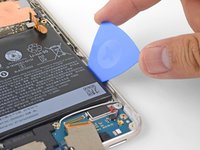
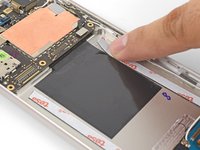
The battery is secured by two strips of double-sided tape.
-
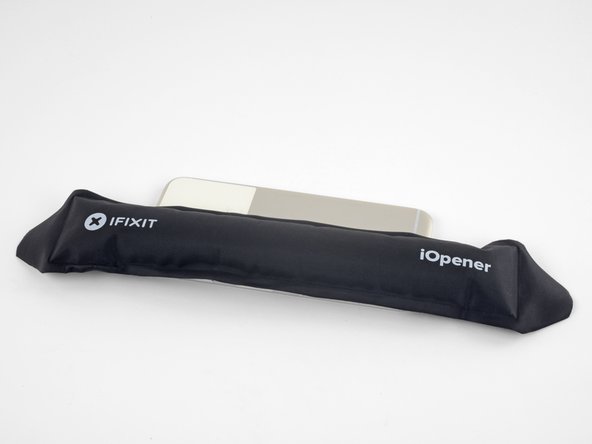
Heat an iOpener and place it on the back of the phone's left edge for two minutes. You may need to reheat and reapply the iOpener.
-
-
-
Flip the phone over.
-
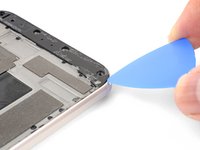
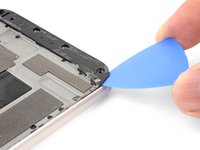
Push an opening pick slowly and firmly down the right edge of the battery (which should be warm). Slide it slightly back and forth to slice through the adhesive.
-
Once you have loosened the right side of the battery from the case, leave an opening pick in place to prevent the adhesive from re-adhering.
-
-
-
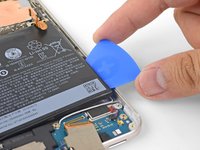
Heat an iOpener and place it on the back of the phone's right edge for two minutes. You may need to reheat and reapply the iOpener.
-
-
-
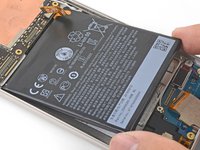
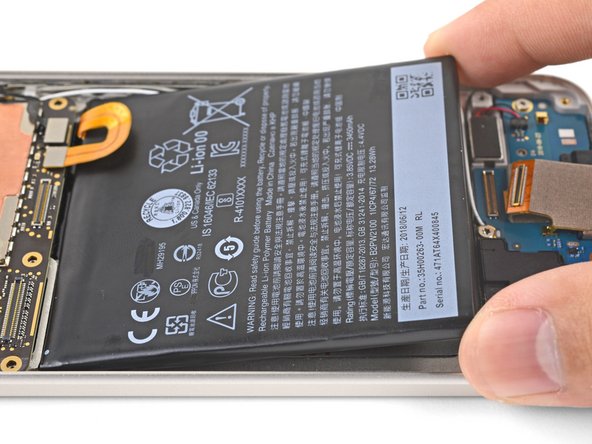
Grasp the loosened right edge of the battery by the corners and slowly swing the right edge upwards.
-
Once the battery pack is loosened from the adhesive, slowly peel the battery out of the frame.
-
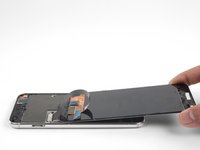
Remove the battery.
-
-
이 단계에 사용된 도구:Tesa 61395 Tape$8.95
-
Apply stretch release adhesive strips, double-sided tape, or pre-cut adhesive strips.
-
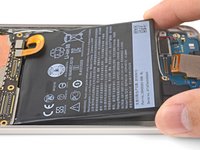
Place the new battery in the recess.
-
Use the flat end of a spudger or your finger to temporarily connect the battery connector to the motherboard.
-
-
-
While the battery is still connected, lift the bottom end of the battery up.
-
Use tweezers to pull all of the adhesive liners off.
-
Carefully lower the battery back into place and press against the edges to activate the adhesive.
-
Use a spudger to pry up and disconnect the battery connector from the motherboard and bend it away slightly.
-
Continue with the reassembly process.
-


If your Pixel won't turn on after you reconnect the screen, there is a chance that the phone has silently turned on when the battery is re-connected. Hold the power button for a few seconds until the phone vibrates off. Afterwards, re-connect the screen, and try again.
To reassemble your device, follow these instructions in reverse order.
After completing this guide, calibrate your newly-installed battery.
Take your e-waste to an R2 or e-Stewards certified recycler.
Repair didn’t go as planned? Check out our Google Pixel XL Answers community for troubleshooting help.
다른 60명이 해당 안내서를 완성하였습니다.

48가이드 댓글
I applied the heat with the iOpener multiple times around the edges (reheating it as needed to where it could barely handle it), and they refused to lift up with the suction cup.
Eventually the screen cracked as I was attempting to pry up an edge out of desperation. First attempt at fixing my own phone = fail whale :(
john fatteu - 답글 공유
Sorry to hear about the unsuccessful repair, John!
Our Support team is here to assist in the event you need to find additional parts to complete your repairs, or if you decide you wish to return the kit that you ordered. Feel free to reach out to us via help.ifixit.com and we’ll do our best to assist you.
Cheers,
Kadan Sharpe - 답글 공유
Is there an ideal temperature to head the adhesive to without destroying the screen?
Jeremy Sing - 답글 공유
@martinsing For most adhesives, 80-85° C is about right. You might have to maintain that temperature for a few minutes before it softens up.
How much deeper do I need to cut with the picks/etc top and bottom. The ~1.5mm of my picks isn’t deep enough to cut all the glue on the bottom (haven’t tried on the top yet); my sides were ‘easy’ to free in that my bad battery already lifed them free leaving the screen secured only top and bottom. I can probe deeper with a card or spudger, but how much farther should I be going.