주요 콘텐츠로 건너뛰기
수리 커뮤니티 가입 - 계정 만들기

Huawei P10 Plus Rear Camera Replacement

필요한 것

  1. Huawei P10 Plus Rear Camera Replacement, Display: 1 단계, 이미지 3개 중 1개 Huawei P10 Plus Rear Camera Replacement, Display: 1 단계, 이미지 3개 중 2개 Huawei P10 Plus Rear Camera Replacement, Display: 1 단계, 이미지 3개 중 3개
    • Use an iOpener to loosen the adhesive beneath the display, focusing on the upper and lower part of the display.

    • Use an opening pick, or iFlex, to separate the adhesive on all sides of the display.

    • To avoid damage to the display, do not push the tool too deeply into the phone.

  2. Huawei P10 Plus Rear Camera Replacement: 2 단계, 이미지 3개 중 1개 Huawei P10 Plus Rear Camera Replacement: 2 단계, 이미지 3개 중 2개 Huawei P10 Plus Rear Camera Replacement: 2 단계, 이미지 3개 중 3개
    • There is a thin display cable between the screen and phone, be very careful not to rip it when opening the device.

    • Place a suction cup, or iSclack, on the upper portion of the phone and lift the display off the midframe.

    • Don't remove the display, the cable is trapped under a bracket screwed to the phone. You can flip the display to lay it down without straining the cable, or simply hold it in the next steps.

  3. Huawei P10 Plus Rear Camera Replacement, Unfasten the screw: 3 단계, 이미지 1개 중 1개
    • Remove the 3.3 mm-long Phillips screw securing the display flex connector bracket.

  4. Huawei P10 Plus Rear Camera Replacement: 4 단계, 이미지 3개 중 1개 Huawei P10 Plus Rear Camera Replacement: 4 단계, 이미지 3개 중 2개 Huawei P10 Plus Rear Camera Replacement: 4 단계, 이미지 3개 중 3개
    이 단계에 사용된 도구:
    Tesa 61395 Tape
    $8.95
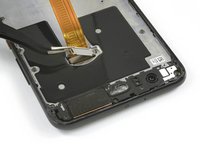
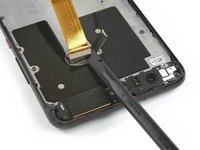
    • Open the metal bracket that covers the display flex cable.

    • Use a spudger to disconnect the display flex cable.

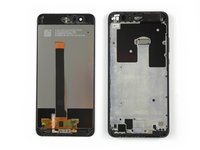
    • Remove the display.

    • When reassembling your phone replace old adhesive with double-sided tape or pre-cut adhesive strips.

  5. Huawei P10 Plus Rear Camera Replacement, Midframe: 5 단계, 이미지 2개 중 1개 Huawei P10 Plus Rear Camera Replacement, Midframe: 5 단계, 이미지 2개 중 2개
    • Remove the 13 Phillips #00 screws.

    • Remove the metal shield which holds down the display flex connector.

  6. Huawei P10 Plus Rear Camera Replacement: 6 단계, 이미지 3개 중 1개 Huawei P10 Plus Rear Camera Replacement: 6 단계, 이미지 3개 중 2개 Huawei P10 Plus Rear Camera Replacement: 6 단계, 이미지 3개 중 3개
    • Remove the SIM card tray.

    • Use the pointed end of a spudger to pry out the mid frame until you can get a good grip.

  7. Huawei P10 Plus Rear Camera Replacement: 7 단계, 이미지 3개 중 1개 Huawei P10 Plus Rear Camera Replacement: 7 단계, 이미지 3개 중 2개 Huawei P10 Plus Rear Camera Replacement: 7 단계, 이미지 3개 중 3개
    • Remove the mid frame.

    • Disconnect the battery flex cable with a spudger.

  8. Huawei P10 Plus Rear Camera Replacement, Rear Camera: 8 단계, 이미지 3개 중 1개 Huawei P10 Plus Rear Camera Replacement, Rear Camera: 8 단계, 이미지 3개 중 2개 Huawei P10 Plus Rear Camera Replacement, Rear Camera: 8 단계, 이미지 3개 중 3개
    • Remove the Phillips #000 screw.

    • Remove the metal clamp.

    • Peel off the adhesive tape that connects the rear camera to the motherboard.

  9. Huawei P10 Plus Rear Camera Replacement: 9 단계, 이미지 2개 중 1개 Huawei P10 Plus Rear Camera Replacement: 9 단계, 이미지 2개 중 2개
    • Use a spudger, to disconnect the rear camera flex cable.

    • Remove the camera.

결론

To reassemble your device, follow these instructions in reverse order. When reassembling your phone apply new adhesive where it is necessary.

다른 2명이 해당 안내서를 완성하였습니다.

작성자

2다른 기여자 명과 함께

Dominik Schnabelrauch

회원 가입일: 11/23/16

258,312 평판

안내서 682개를 작성함

iFixit iFixit 회원

Staff

123 회원들

안내서 25,710개를 작성함

0가이드 댓글

댓글 쓰기

조회 통계:

지난 24시간: 2

지난 7일: 5

지난 30일: 81

전체 시간: 2,490