이 번역은 원본 안내서의 최신 업데이트를 반영하지 않을 수 있습니다. 번역 업데이트를 돕거나 아니면 원본 안내서 보기를 참조하세요.
소개
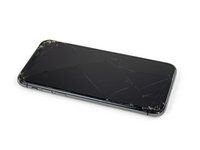
iPhone 13 Pro 스크린에 금이 가고, 터치에 반응이 없거나, 휴대폰을 켰을 때 스크린에 아무것도 나타나지 않는 경우, 이 안내서를 사용하여 새 스크린으로, 일명 디스플레이 어셈블리, 교체하여 수리하세요.
참고: 정품 Apple 스크린을 사용하는 경우에도 True Tone 및 자동 밝기 기능은 스크린 교체 후 비활성화됩니다. iPhone의 iOS가 iOS 15.2 이상이 아니라면 Face ID도 비활성화됩니다.
필요한 것
-
-
분해를 시작하기 전에 iPhone 전원을 꺼주세요.
-
iPhone 하단 가장자리에 위치한 6.8mm 길이의 pentalobe/펜타로브 P2 나사 두 개를 분리하세요.
-
-
-
피크릐 끝에서 3mm를 측정하고 마커로 피크에 표시하세요.
Got to step 2 and realized the fix kit doesn't include an opening pick! Looks like a guitar pick, and I have those lying around. Is that expected? Looks like the pick is used in many steps below. There's a little blue crowbar that isn't mentioned in the instructions. Perhaps that replaces the opening pick?
Hi! I can't see which guide you were using when writing this comment. Can you reply here with which guide and fix kit you used?
I see you posted this in Meta. I hope it's resolved soon! In the meantime, a guitar pick may work well enough for your repair.
what fix kit?
My fix kit didn't include an opening pick either
My AliExpress refurbished screen came with a pick that has a coin-like circle that pops out, so no modification was necessary
It's not an Ifixit KIT if it doesn't include everything. You'll need to order the opening pic separately. Or head to Walmart like myself and look for guitar pics. Hopefully, this will work just as well.
No pick in mine as well. It’s really not clear that you have to order this separately when ordering an IPhone SE 202/2022 screen repair kit. Is this the case?
Frustrated, I ordered a compact package where everything was encapsulated. Useless suction tools could not separate the screen. If it is unable to decouple the screen, then why sucking suction tools you have provided.
For my kit the triangle pick was stuck inside the box with the screen not with the other tools maybe it's also there for you
Y’all are getting far, FAR too detailed with some of this stuff…. Measuring and marking the pick that you won’t actually use to open the device?!? lol that’s kinda funny. Just heat it up, grab a spudger, and the back just pops right off! The iFixit tech need to stick to the KISS method more often, you know KEEP IT SIMPLE STUPID!!! Like l, for reals, I’ve been doing this stuff for YEARS and using iFixit guides regularly and this is just ridiculous at this point!
Will the phone still work if the sensor assembly on the back of the screen is damaged?
-
-
-
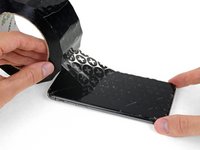
화면 전체가 덮일 때까지 iPhone 스크린에 테이프를 겹쳐서 붙이세요.
-
다음 몇 단계에서 흡착 컵이 잘 고정되지 않는다면 (덕트 테이프와 같은) 강력한 테이프를 손잡이로 만들어서 스크린을 들어 올리세요.
-
-
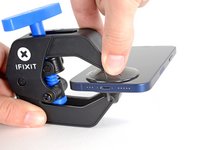
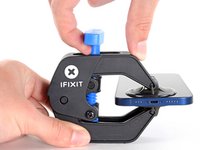
이 단계에 사용된 도구:Clampy - Anti-Clamp$24.95
-
파란색 손잡이를 뒤로 당겨 안티-클램프의 팔을 잠금 해제하세요.
-
팔을 iPhone의 왼편 가장자리 위로 밀어 주세요.
-
흡입 컵을 휴대폰의 하단 가장자리 홈 버튼 근처에 배치하세요—전면에 하나, 후면에 하나.
-
적절한 위치에 컵을 함께 꽉 쥐고 흡착하세요.
-
-
-
-
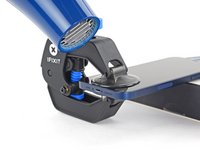
유리 가장자리는 피하면서, 휴대폰 하단 가장자리에 흡입 핸들을 사용하세요.
-
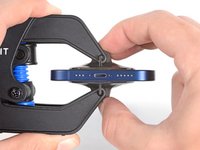
흡입 컵을 확실하고 일정한 압력으로 위로 당겨 전면 패널과 후면 케이스 사이에 약간의 틈을 만드세요.
-
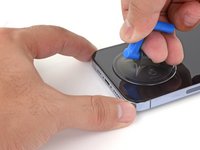
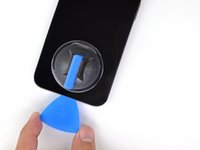
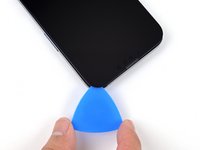
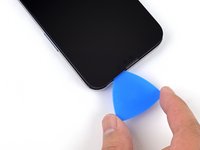
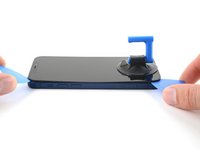
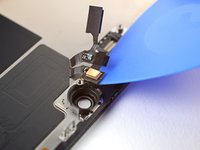
틈 사이로 opening pick/여는 픽을 삽입하세요.
-
-
-
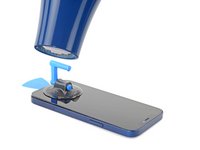
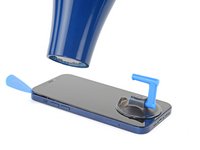
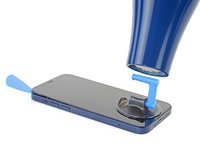
헤어 드라이어를 사용하여 iPhone의 오른쪽 가장자리(전원 버튼이 있는 가장자리)를 90초 동안 또는 스크린이 만지기 어려울 정도로 약간 뜨거워질 때까지 가열하세요.
-
-
-
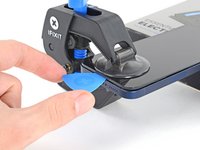
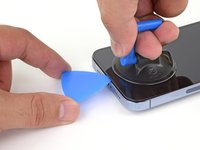
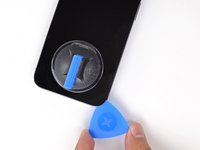
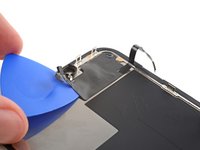
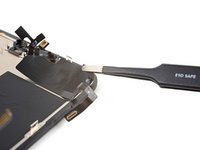
iPhone의 오른쪽 하단 모서리를 돌아 여는 픽을 밀어서 접착제를 분리하세요.
-
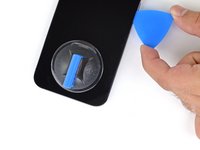
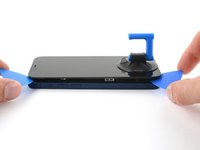
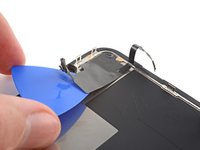
오른쪽 상단 모서리에 도달할 때까지 iPhone의 오른쪽 가장자리를 따라 계속 밀어 올리세요.
-
계속하기 전에 픽을 오른쪽 상단 모서리에 그대로 두세요.
-
-
-
-
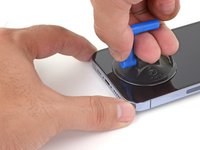
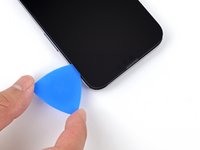
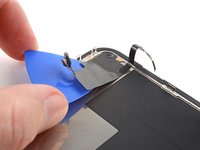
iPhone의 오른쪽 하단 모서리를 돌아 여는 픽을 밀어서 상단 접착제를 분리하세요.
-
계속하기 전에 픽을 왼쪽 상단 모서리에 그대로 두세요.
-
-
-
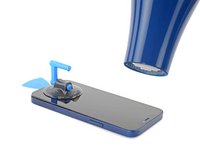
헤어 드라이어를 사용하여 iPhone의 왼쪽 가장자리를 90초 동안 또는 스크린이 만지기 어려울 정도로 약간 뜨거워질 때까지 가열하세요.
-
-
-
흡입 핸들을 스크린에서 분리하세요.
-
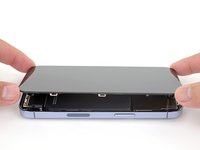
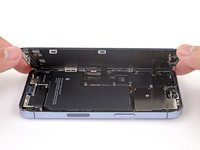
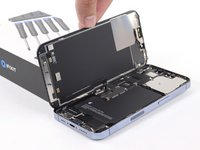
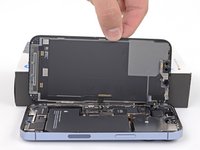
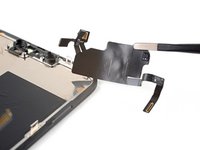
책의 뒷 표지처럼 디스플레이 왼편을 위로 펼쳐서 iPhone을 열어주세요.
-
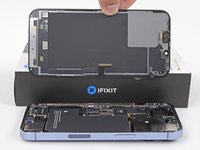
휴대폰을 작업하는 동안 디스플레이를 다른 물건에 기대어 세워 놓으세요.
-
-
이 단계에 사용된 도구:Magnetic Project Mat$19.95
-
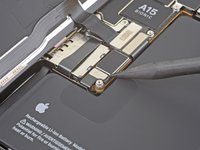
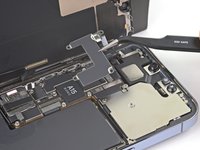
Y000 스크루드라이버를 사용하여 배터리 커넥터 커버를 고정하는 1.3mm 나사 세 개를 풀어주세요.
-
-
-
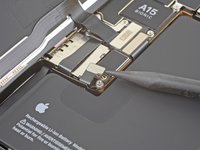
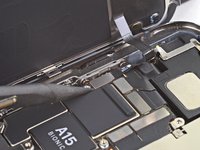
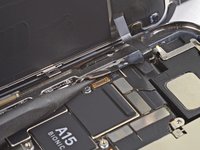
Spudger/스퍼저의 뾰죡한 끝 또는 깨끗한 손톱을 사용하여 배터리 커넥터를 로직 보드의 커넥터 소켓에서 들어올리세요.
-
수리 중에 실수로 소켓에 닿아 휴대폰에 전원이 공급되지 않도록 커넥터를 로직 보드에서 약간 멀리 구부려 주세요.
-
-
-
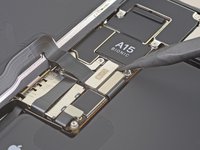
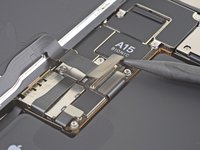
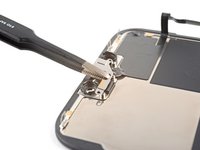
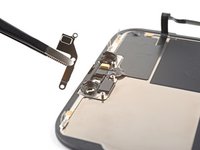
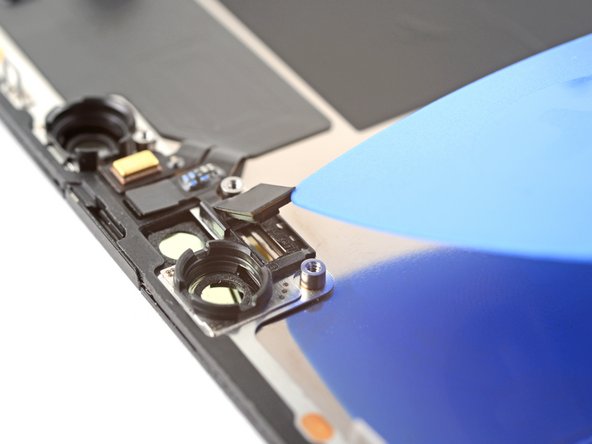
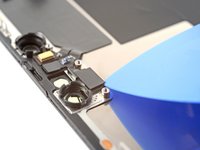
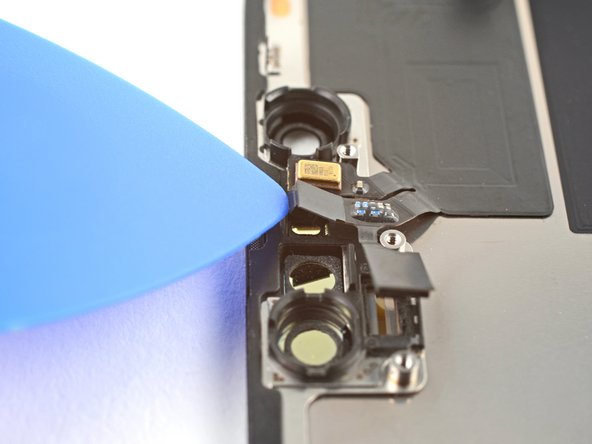
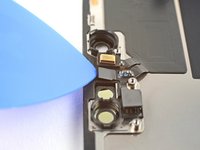
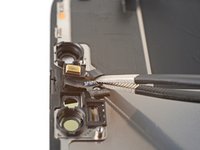
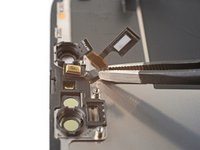
Y000 스크루드라이버를 사용하여 전면 센서 커넥터 커버에서 1.1mm 나사 두 개를 풀어주세요.
-
Phillips/십자 스크루드라이버를 사용하여 커버에서 나머지 나사 두 개를 풀어주세요:
-
1.5mm 나사 한 개
-
1.8mm 나사 한 개
-


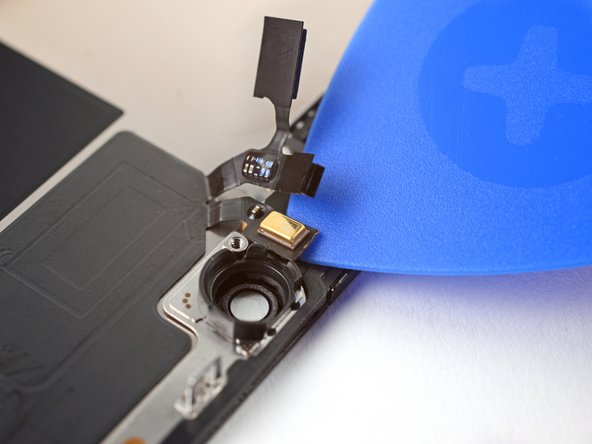

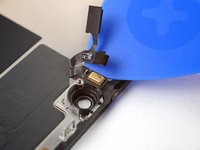


새 교체 부품을 원래 부품과 비교하세요—설치하기 전에 남아있는 부품을 옮기거나 새 부품에서 접착제 보호필름을 제거해야 할 수 있습니다.
기기를 재조립하려면, 위의 안내서를 역순으로 따르세요.
전자 폐기물을 R2 또는 e-Stewards 인증 재활용 센터로 가져가세요.
수리가 계획대로 진행되지 않았습니까? 자사의 기본 문제 해결 페이지를 읽거나 iPhone 13 Pro 답변 커뮤니티에서 도움을 받으세요.
새 교체 부품을 원래 부품과 비교하세요—설치하기 전에 남아있는 부품을 옮기거나 새 부품에서 접착제 보호필름을 제거해야 할 수 있습니다.
기기를 재조립하려면, 위의 안내서를 역순으로 따르세요.
전자 폐기물을 R2 또는 e-Stewards 인증 재활용 센터로 가져가세요.
수리가 계획대로 진행되지 않았습니까? 자사의 기본 문제 해결 페이지를 읽거나 iPhone 13 Pro 답변 커뮤니티에서 도움을 받으세요.
다른 19명이 해당 안내서를 완성하였습니다.
다음 번역가들에게 특별히 감사 드립니다:
94%


이 번역인들은 저희가 세상을 수리하는 데 도움을 주고 있어요! 기여하시겠습니까?
번역 시작하기 ›

댓글 8개
True Tone and auto brightness functionality is disabled after a screen replacement, even when using an original Apple screen. Face ID is also disabled, unless the iPhone is running iOS 15.2 or newer.
Justin Lee - 답글
How True are these comments above
Unless it's done buy an authorized Apple service centre the True Tone doesn't work, I didn't realize what a hassle not having True Tone is until I didn't have it. I was charged $600 to replace my screen just to find out Apple only charges $400, I got my old screen back swapped the screens, taking the screen back to the repair place and taking my phone in to get the screen swapped properly. Was pretty !#^&@@ off when I found all this out.
What was the issue you had with your screen they necessitated a replacement? Was it the infamous white screen of death aka WSOD?
devexxis -
why the price of the screen is so high ?
Iphone X for exemple is 70$
The top of your ipro 13 guide calls for iPhone 13 Pro Display Assembly Adhesive and the bottom of your guide calls for the adhesive tape but does not mention what the mm width of the tape to order. Do I need both of these or these two items an either/or situation?