이 번역은 원본 안내서의 최신 업데이트를 반영하지 않을 수 있습니다. 번역 업데이트를 돕거나 아니면 원본 안내서 보기를 참조하세요.
소개
iPhone 14 Pro의 스크린에 금이 가고, 터치에 반응이 없거나, 휴대폰을 켰을 때 화면에 아무것도 나타나지 않는 경우, 이 안내서를 사용하여 새 스크린으로, 일명 디스플레이 어셈블리, 수리하세요.
이 안내서는 A2890 (국제) 모델을 사용하여 작성되었습니다. 다른 iPhone 14 Pro 모델을 수리한다면 약간의 시각적 차이가 있을 수 있으나 수리 절차는 동일합니다.
안전한 작업을 위하여, 기기를 분해하기 전에 배터리를 25% 이하로 방전하세요. 이는 배터리를 수리 도중 실수로 손상할 때 일어날 수 있는 화재 위험을 줄일 수 있습니다. 배터리가 부풀어 올랐다면 적절한 조치를 취하세요.
참고: 정품 Apple 스크린을 사용한 경우에도 True Tone 및 화면 자동 밝기 기능은 스크린 교체 작업 후 비활성화됩니다. iPhone의 iOS 버전이 iOS 15.2 이상이 아니라면 Face ID도 비활성화됩니다.
기기를 재조립할 때 스크린을 다시 부착하려면 교체용 접착제가 필요합니다. 기기는 정상적으로 작동하지만 IP (Ingress Protection/방수) 등급을 잃을 가능성이 높습니다.
필요한 것
-
-
분해를 시작하기 전에 iPhone 전원을 끄세요.
-
iPhone 하단 가장자리에 위치한 6.8mm-길이 pentalobe/펜타로브 P2 별나사를 풀어주세요.
-
-
-
피크릐 끝에서 3mm를 측정하고 마커로 피크에 표시하세요.
Got to step 2 and realized the fix kit doesn't include an opening pick! Looks like a guitar pick, and I have those lying around. Is that expected? Looks like the pick is used in many steps below. There's a little blue crowbar that isn't mentioned in the instructions. Perhaps that replaces the opening pick?
Hi! I can't see which guide you were using when writing this comment. Can you reply here with which guide and fix kit you used?
I see you posted this in Meta. I hope it's resolved soon! In the meantime, a guitar pick may work well enough for your repair.
what fix kit?
My fix kit didn't include an opening pick either
My AliExpress refurbished screen came with a pick that has a coin-like circle that pops out, so no modification was necessary
It's not an Ifixit KIT if it doesn't include everything. You'll need to order the opening pic separately. Or head to Walmart like myself and look for guitar pics. Hopefully, this will work just as well.
No pick in mine as well. It’s really not clear that you have to order this separately when ordering an IPhone SE 202/2022 screen repair kit. Is this the case?
Frustrated, I ordered a compact package where everything was encapsulated. Useless suction tools could not separate the screen. If it is unable to decouple the screen, then why sucking suction tools you have provided.
For my kit the triangle pick was stuck inside the box with the screen not with the other tools maybe it's also there for you
Y’all are getting far, FAR too detailed with some of this stuff…. Measuring and marking the pick that you won’t actually use to open the device?!? lol that’s kinda funny. Just heat it up, grab a spudger, and the back just pops right off! The iFixit tech need to stick to the KISS method more often, you know KEEP IT SIMPLE STUPID!!! Like l, for reals, I’ve been doing this stuff for YEARS and using iFixit guides regularly and this is just ridiculous at this point!
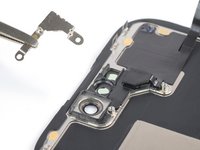
Will the phone still work if the sensor assembly on the back of the screen is damaged?
-
-
-
투명테이프를 iPhone 화면 전체를 덮도록 붙여주세요.
-
흡착 손잡이가 디스플레이에 붙지 않는다면, 이를 대체하기 위해 강력테이프를 접어 간이 손잡이를 만들어 디스플레이를 들어올려주세요.
-
-
-
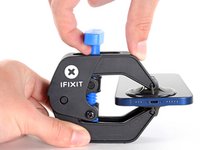
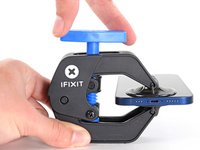
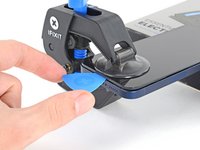
파란색 손잡이를 뒤로 당겨서 안티클램프의 팔의 잠금을 해제하세요.
-
안티클램프 팔을 iPhone 왼편 또는 오른편 모서리에 맞추세요.
-
흡착 컵을 iPhone 하단 가장자리 근처에 배치하세요—하나는 전면에, 하나는 후면에.
-
컵을 함께 꽉 눌러서 원하는 부위에 부착하세요.
-
-
-
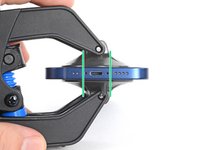
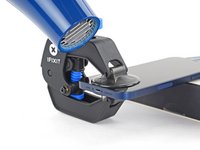
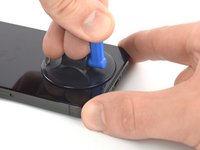
유리의 맨 가장자리를 피하면서 휴대폰의 하단 가장자리에 흡입 손잡이를 흡착하세요.
-
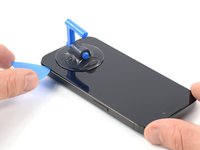
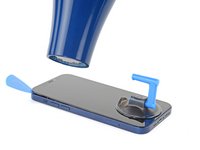
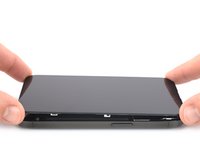
흡입 컵을 확실하고 일정한 압력으로 위로 당겨 스크린과 프레임 사이에 약간의 틈을 만드세요.
-
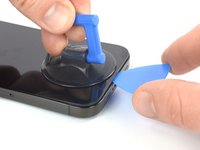
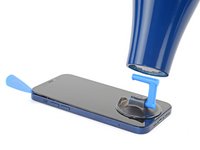
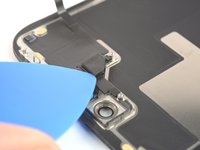
스크린의 플라스틱 베젤 밑 틈 사이로 opening pick/여는 픽을 끼우세요.
-
-
-
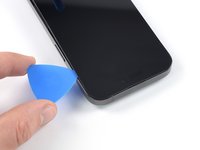
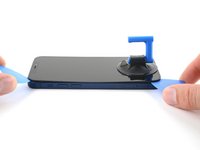
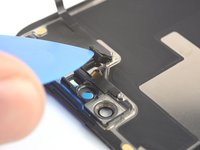
여는 픽을 iPhone 하단 오른쪽 모서리를 돌아 오른편 가장자리를 따라 밀어서 접착제를 잘라주세요.
-
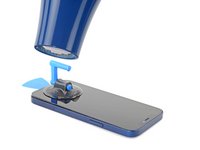
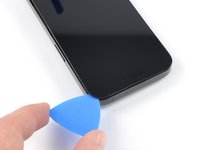
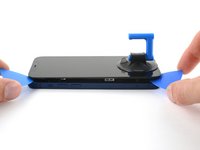
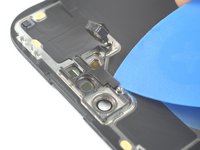
오른쪽 상단 모서리에 도달할 때까지 iPhone의 오른쪽 가장자리를 따라 계속 밀어 올리세요.
-
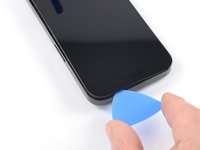
계속하기 전에 픽을 오른쪽 상단 모서리에 그대로 두세요.
-
-
-
-
스크린에서 흡입 핸들을 분리하세요.
-
오른쪽 가장자리가 자신을 향하도록 iPhone을 돌리세요.
-
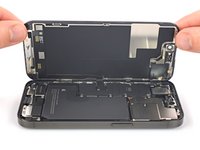
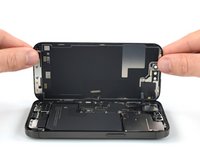
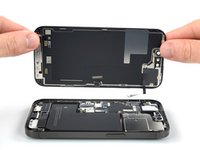
책의 앞 표지처럼 스크린 오른편을 위로 펼쳐서 iPhone을 열어주세요.
-
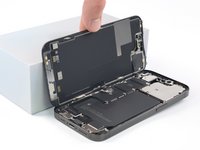
휴대폰에 작업하는 동안 디스플레이를 다른 물건에 기대어 세워 놓으세요.
-
-
이 단계에 사용된 도구:Magnetic Project Mat$19.95
-
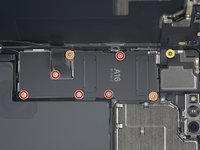
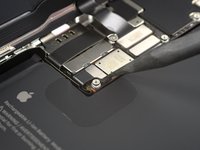
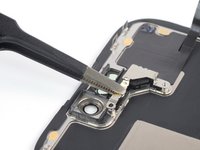
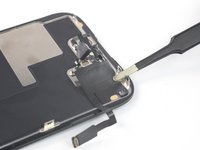
Y000 스크루드라이버를 사용하여 배터리 커넥터 커버를 고정하는 나사 여덟 개를 풀어주세요:
-
1.3mm 길이 나사 다섯 개
-
1.6mm 길이 나사 두 개
-
1.9mm 길이 나사 한 개
-
-
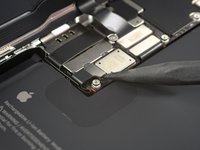
이 단계에 사용된 도구:Tweezers$4.99
-
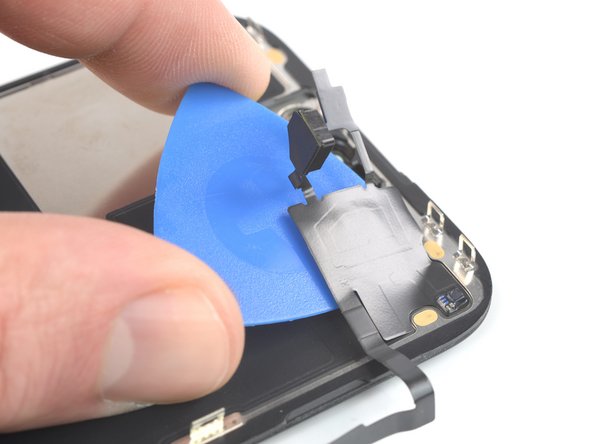
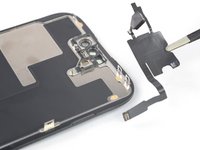
핀셋으로 커넥터 커버를 잡고 아래쪽으로 밀어 플렉스 케이블에 걸리지 않도록 하세요.
-
커넥터 커버를 분리하세요.
-
-
-
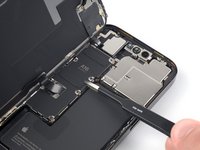
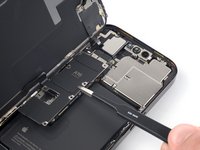
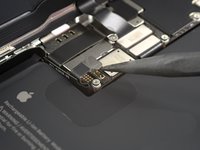
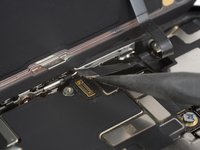
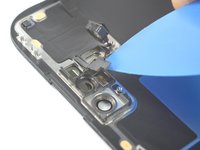
스퍼저의 뾰족한 끝을 사용하여 배터리 케이블을 소켓에서 들어올리세요.
-
수리 중에 실수로 소켓에 닿아 휴대폰에 전원이 공급되지 않도록 커넥터를 로직 보드에서 약간 멀리 구부려 주세요.
-


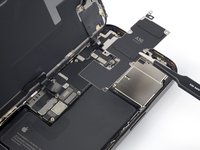


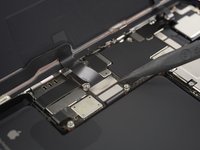


새 접착제를 설치하고 다시 씰링하기 전에 기기를 켜고 수리가 잘 되었는지 확인해보세요.
기기를 재조립하려면 이 지침들을 역순으로 따르세요.
새 디스플레이를 고정하는 가장 좋은 방법은 맞춤 재단된 양면-테이프를 프레임에 붙이고 디스플레이를 원래 위치에 장착하는 것입니다.
전자 폐기물을 R2 또는 e-Stewards 인증 재활용 센터로 가져가세요.
새 접착제를 설치하고 다시 씰링하기 전에 기기를 켜고 수리가 잘 되었는지 확인해보세요.
기기를 재조립하려면 이 지침들을 역순으로 따르세요.
새 디스플레이를 고정하는 가장 좋은 방법은 맞춤 재단된 양면-테이프를 프레임에 붙이고 디스플레이를 원래 위치에 장착하는 것입니다.
전자 폐기물을 R2 또는 e-Stewards 인증 재활용 센터로 가져가세요.
다른 18명이 해당 안내서를 완성하였습니다.
다음 번역가들에게 특별히 감사 드립니다:
88%


이 번역인들은 저희가 세상을 수리하는 데 도움을 주고 있어요! 기여하시겠습니까?
번역 시작하기 ›


댓글 7개
Is it in the future possible with a programmer for fixing the loss of True Tone and auto brightness funktions ?
J'ai acheter un écran reconditionner à neuf sur l'iphone 14 pro d origine... Après changement il indisque'message concernant la pièce qui' est pas authentique... 'c'est normal ??
Bonjour,
C'est malheureusement normal si l'iPhone n'a pas été reconditionné par Apple. Apple pratique ce qu'on appelle "l'appariement des pièces" et ne propose pas de solutions aux particuliers ou entreprises en dehors de leur réseau afin de relier la nouvelle pièce à la carte mère de l'iPhone lors d'une réparation. En pratique, l'écran fonctionnera normalement mais la fonction TrueTone sera désactivée et ce message d'avertissement pourra apparaître de temps à autre.
I just want to replace LCD display. My touch of the phone is okay. Is the method still the same?
Enosh More - 답글
Hi Enosh More,
There are ways to replace only the glass of the screen, however they require very precise action and we don't recommend it. Replacing only the OLED without the touchscreen is not possible as far as I know, considering the sandwiching of the layers. Therefore, I suggest replacing the screen as a whole with a functional replacement part as described in the guide.