이 번역은 원본 안내서의 최신 업데이트를 반영하지 않을 수 있습니다. 번역 업데이트를 돕거나 아니면 원본 안내서 보기를 참조하세요.
소개
이 안내서를 사용하여 Nintendo Switch OLED 스크린을 교체하세요.
원래 모델의 플라스틱 커버 및 LCD 백킹과는 달리 Switch OLED 스크린은 OLED 디스플레이와 융합한 유리 커버입니다.
즉, 이 절차를 진행할 때 강화되지 않고 깨지기 쉬운 디스플레이 패널을 깨뜨릴 수 있는 확률이 높다는 것을 의미합니다. 비집는 단계에서 충분히 열을 가하고 각별히 주의하세요.
안전을 위해서, Switch를 분리하기 전에 25% 이하로 방전하세요. 이는 배터리 수리 도중 실수로 손상할 때 일어날 수 있는 열 화재 위험을 줄일 수 있습니다. 배터리가 부풀어 올랐다면, 적절한 예방 조치를 취하세요.
Switch OLED는 JIS 나사를 사용하지만 유사시에는 Phillips/십자 드라이버를 사용할 수 있습니다. 나사산을 벗기지 않도록 각별히 주의하세요. iFixit의 Phillips/십자 비트는 JIS 스타일 나사와 교차 호환하도록 설계하였습니다.
참고: 실드 플레이트를 분리할 때, 플레이트와 방열판 사이의 열 화합물을 교체해야 합니다. 일반 열 페이스트는 큰 간격을 잇도록 설계되지 않았기 때문에 가장 가까운 대체품은 K5 Pro 점성 열 페이스트입니다.
이 안내서를 완료하려면 교체용 접착제가 필요합니다.
필요한 것
-
-
Joy Con 컨트롤러 후면의 작은 동그란 버튼을 누르고 있으세요.
-
버튼을 누른 상태에서, 컨트롤러를 위를 향해서 미세요.
-
-
-
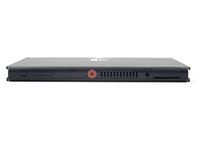
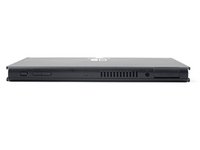
Phillips/십자 드라이버 또는 JIS 드라이버를 사용하여 후면 케이스 상단을 프레임에 고정하는 2mm-길이 나사를 풀어주세요.
-
-
-
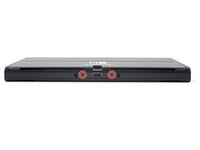
Phillips/십자 드라이버를 사용하여 오른편 Joy-Con 센서 레일을 후면 케이스에 고정하는 3.8mm-길이 나사를 풀어주세요.
-
-
-
Phillips/십자 드라이버를 사용하여 왼편 Joy-Con 센서 레일을 후면 케이스에 고정하는 3.8mm 나사를 풀어주세요.
-
-
-
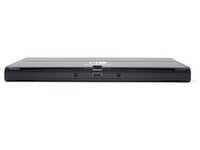
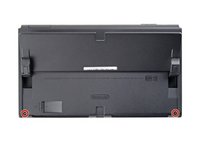
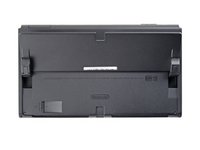
Y00 드라이버를 사용하여 후면 케이스를 프레임에 고정하는 4.3mm 나사 두 개를 풀어주세요.
-
-
-
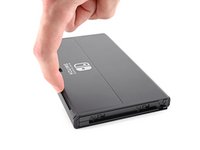
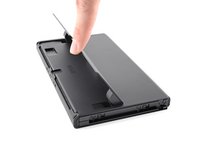
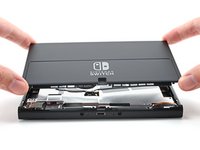
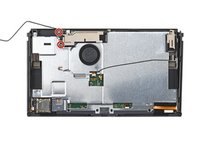
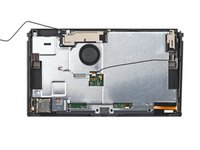
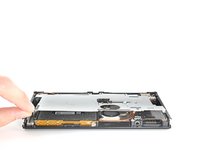
기기 상단에서 후면 케이스를 들어 올려 분리하세요.
Just a heads up that, even after removing the screws, the rear plate is still heavily clipped in place. I recommend using an opening pick or opening tool to carefully pry it up starting at the top and working your way down the sides. Once you get to the bottom, the speaker grilles are a little tricky. They're attached to the rear plate, but they can get stuck easily as you're removing the back plate.
-
-
-
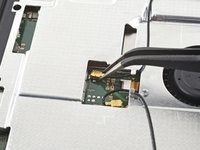
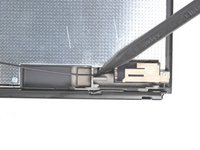
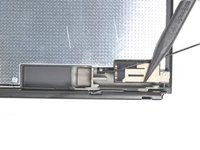
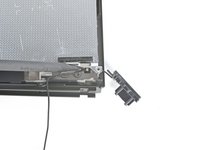
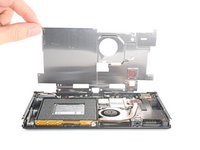
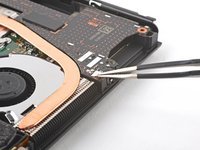
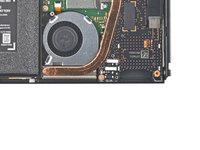
Spudger/스퍼저의 평평한 끝을 사용하여 실드 플레이트에서 테이프 모서리를 분리하세요.
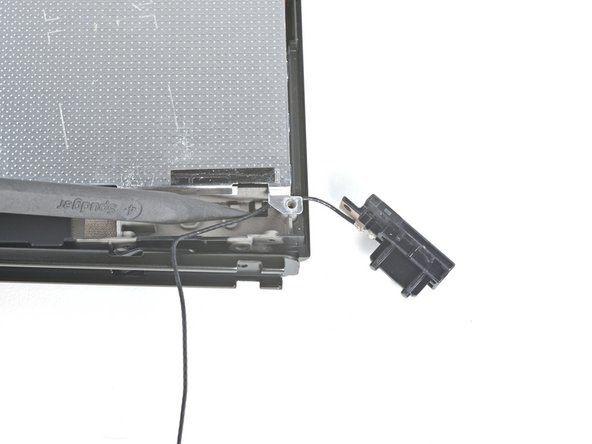
Don't remove the antenna tape or the wires from the tape! The antennae can come off with the large metal shield plate anyways, so why remove them separately?? Extra UNNECESSARY WORK!! Just unscrew the antennae modules themselves, and pop out the antenna wires from the mainboard. Then they will lift with the large metal plate. (Steps 10, 11, 15, 16 are unnecessary, just remove the screws only that hold them down)
-
-
-
-
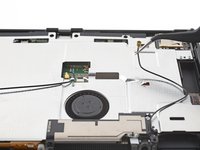
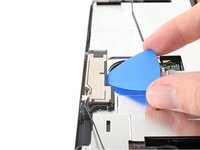
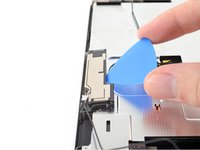
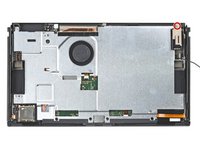
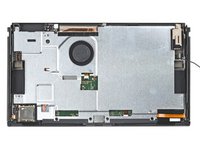
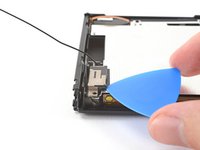
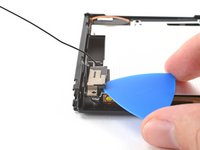
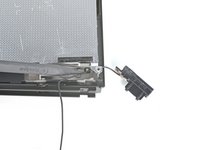
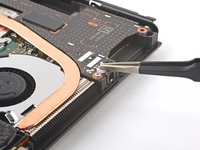
기본 Wi-Fi 안테나와 실드 플레이트 사이에 여는 픽을 끼우세요.
-
픽으로 들어 올려 실드 플레이트에서 기본 Wi-Fi 안테나를 분리하세요.
-
-
-
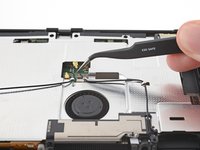
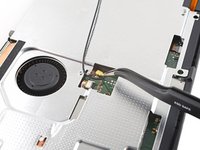
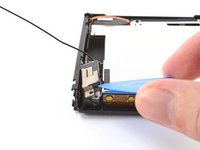
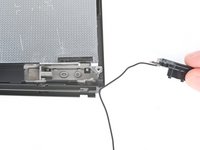
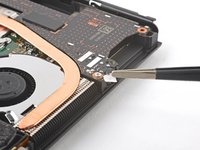
Spudger/스퍼저 끝을 사용하여 보조 Wi-Fi 안테나의 동축 케이블을 프레임의 슬롯에서 경로 변경하세요.
-
-
-
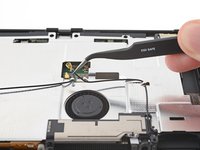
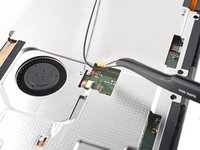
보조 Wi-Fi 안테나와 실드 플레이트 사이에 여는 픽을 끼우세요.
-
픽으로 들어 올려 실드 플레이트에서 보조 Wi-Fi 안테나를 분리하세요.
-
-
-
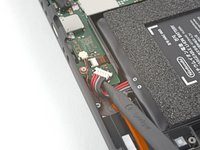
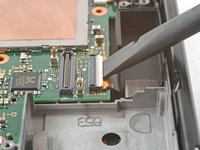
Spudger/스퍼저 끝을 사용하여 배터리를 들어 올려서 연결 해제하세요.
-
-
-
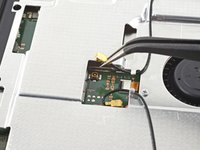
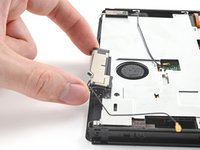
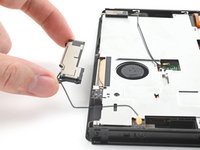
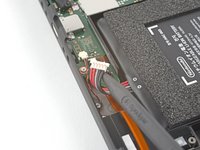
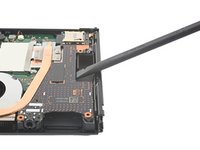
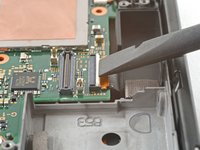
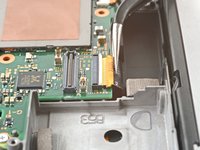
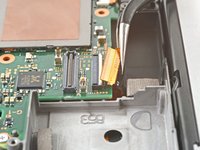
도터보드 가장자리와 마더보드 사이에 spudger/스퍼저를 끼우세요.
-
Spudger/스퍼저를 들어 올려 프레스 커넥터를 연결 해제하고 도터보드를 프레임에서 분리하세요.
-
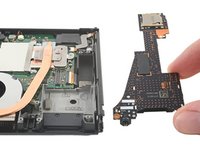
도터보드를 분리하세요.
-
-
-
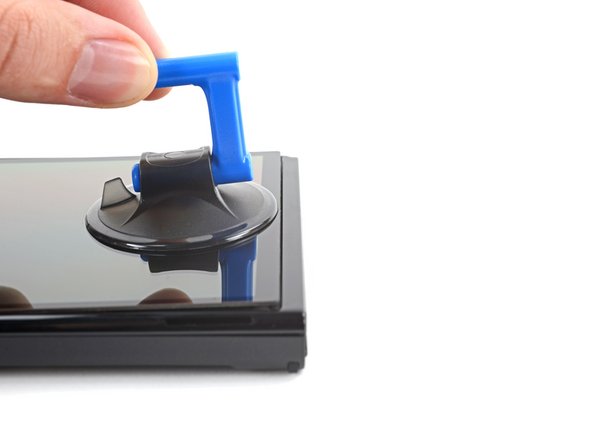
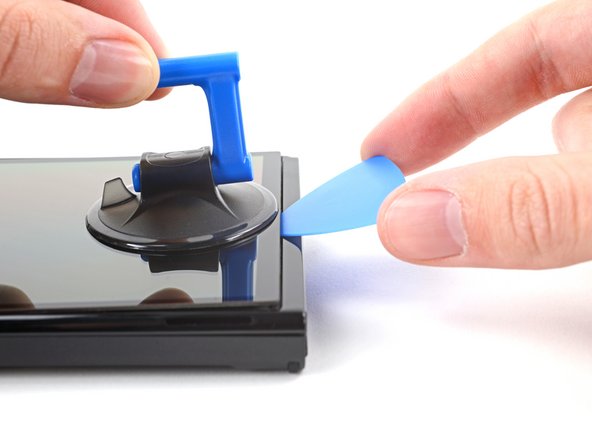
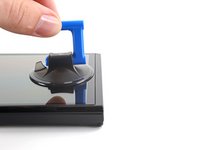
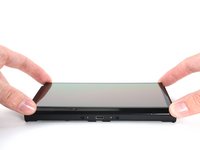
스크린을 만질 수 있을 만큼 따뜻해지면 흡인 손잡이를 화면 하단 가장자리에 최대한 가까이 대세요.
-
흡입 손잡이로 스크린을 들어 올려 스크린과 프레임 사이에 작은 틈을 만드세요.
-
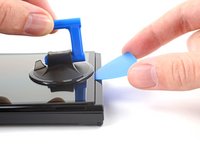
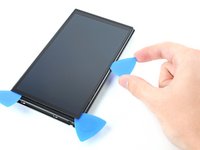
프레임과 스크린 사이의 틈에 여는 픽을 끼우세요.
This step took quite a long time to complete. The adhesive on my switch was very strong, and required several repetitive cycles of heating and suctioning. One of the iFixit teardown videos of the OLED switch mentions using "consistent suction" to pull up the screen. I replaced the plastic lever on my suction cup with a metal chopstick. It helped with a very persistent and consistent pull that eventually separated the screen from the frame.
Same as comment above, this adhesive is very strong and rigid. The iOpener didnt work for me on this stage after many times. I finally I used a soldering heat gun set at 215 F for about 15 seconds. That worked really well because I was able to leave the suction cup attached and apply constant pull while the warm air was heating the adhesive. Once you get the first pick in there, the rest is much easier.
-
-
-
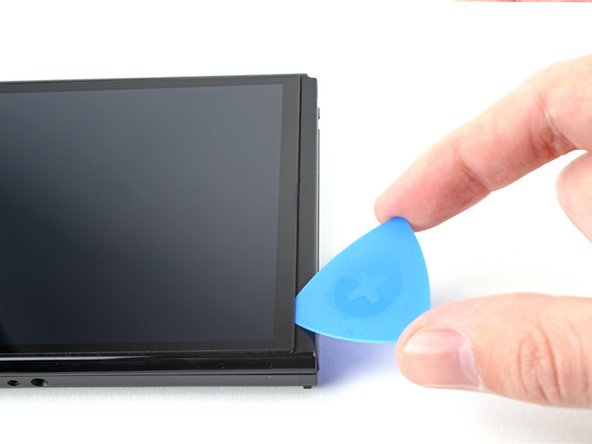
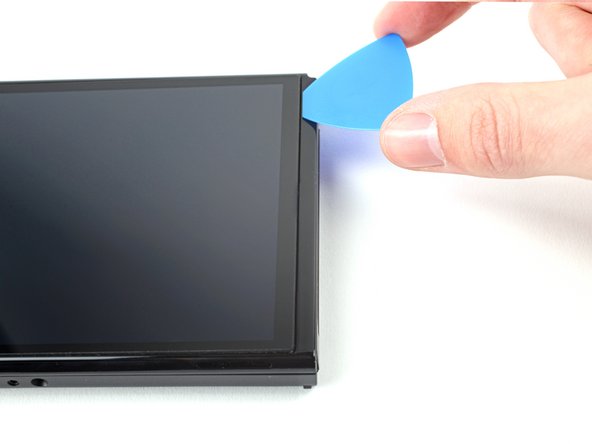
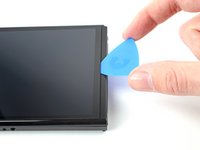
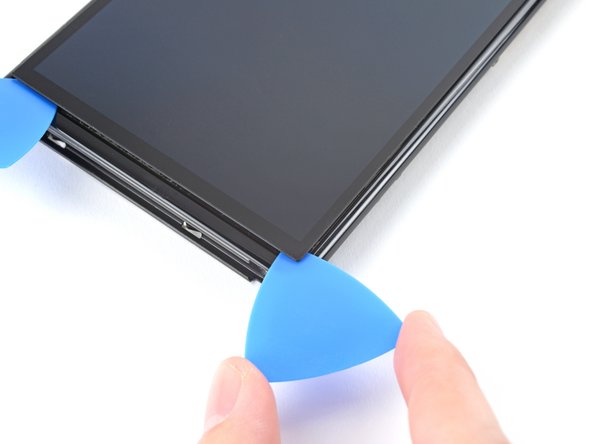
만들어진 틈에 새 여는 픽을 끼우세요.
-
여는 픽을 기기 상단 오른편 모서리를 돌아서 미세요.
-
접착제가 다시 붙지 않도록 여는 픽을 남겨 두세요.
-
-
-
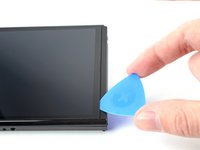
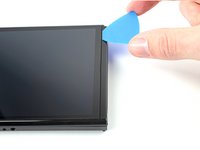
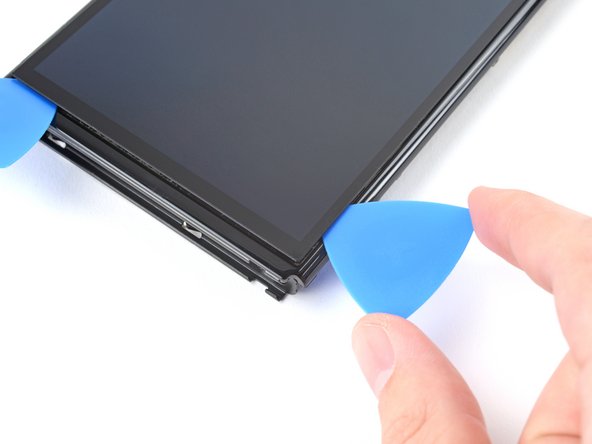
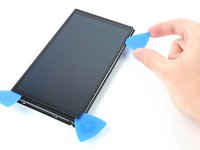
만들어진 틈에 새 여는 픽을 끼우세요.
-
기기 오른편 가장자리를 따라 새 픽을 상단 왼편 모서리를 향해 미세요.
-
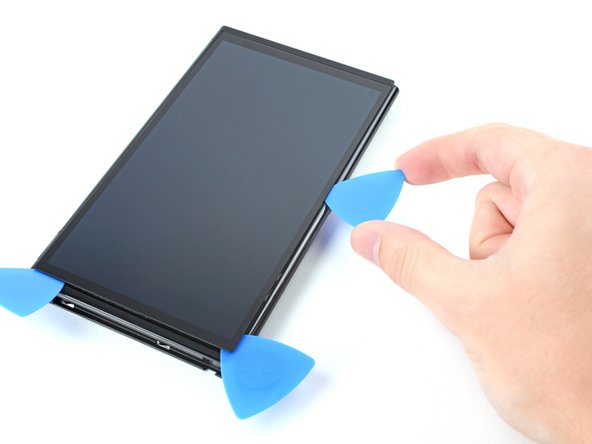
나머지 가장자리에 가열 및 자르기 과정을 반복하여 접착제를 분리하세요.
-
-
-
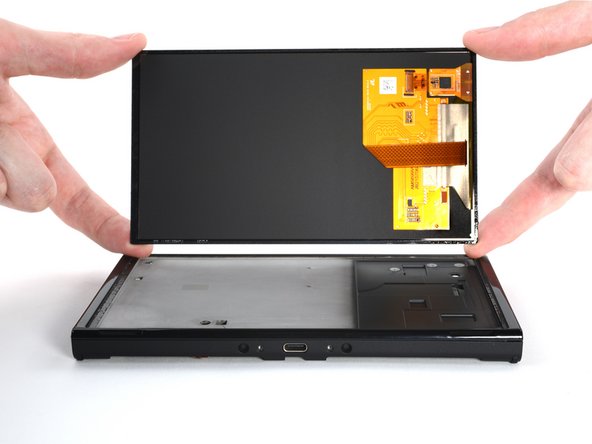
디스플레이 케이블을 프레임에 끼우며 기기에서 스크린을 들어 올리세요.
Which width of sticky tape is needed? I’d like to have everything ready before I open it up!
Hi Claire!
We don't typically give widths because you could realistically use 1-4 mm tape or even two side-by-side layers of 1 mm if you don't want to buy 2 mm tape, but you're right that we should have limits or recommendations! For this repair, 2 mm tape should work well. You can also use multiple layers of 1 mm depending on what future repairs you want to use with the leftover tape.
-


기기를 재조립하려면, 이 지침들을 역순으로 따르세요.
새 교체 부품을 원래 부품과 비교하세요—설치하기 전에 나머지 부품을 옮기거나 새 부품에서 접착 뒷면을 제거해야 할 수 있습니다.
수리가 계획대로 진행되지 않았습니까? 자사의 기본 문제 해결 또는 Nintendo Switch OLED 답변 커뮤니티에서 도움을 받으세요.
기기를 재조립하려면, 이 지침들을 역순으로 따르세요.
새 교체 부품을 원래 부품과 비교하세요—설치하기 전에 나머지 부품을 옮기거나 새 부품에서 접착 뒷면을 제거해야 할 수 있습니다.
수리가 계획대로 진행되지 않았습니까? 자사의 기본 문제 해결 또는 Nintendo Switch OLED 답변 커뮤니티에서 도움을 받으세요.
다른 11명이 해당 안내서를 완성하였습니다.
다음 번역가들에게 특별히 감사 드립니다:
90%

Christian Kim님은 저희가 세상을 수리하는데 동참하신 분입니다! 기여하시겠습니까?
번역 시작하기 ›


댓글 9개
Amazing guide! Steps were easy to follow and allowed me to knock out my Switch OLED screen replacement in about 1.5-2 hours, including a few intermissions to clean the internals. The only thing I would add to this guide are a few steps at the end for removing the old adhesive, applying the new Tesa tape, folding/threading the ribbon cable on the new screen, and plugging the ribbon cable into the Switch to make this a true one-stop shop. The 1mm Tesa tape worked like a charm, although there is one side of the screen frame where you need to do three strips instead of one, you don't have to buy a bigger size just for that side. Thanks again iFixit! Y'all rock!
Hi Kyle.
Thank you for the appreciation and the tips! I changed the last step a bit to hopefully remind people to re-thread the display cable. We will consider making a dedicated reassembly step ;)
nope not doin this
alex gamer - 답글
I stripped a screw on my Nintendo Switch OLED, now there’s absolutely no way for me to open it, I wanted to replace my Nintendo Switch Card Cover, and now I can’t. I’m gonna have to get a new Switch now :(
Oh my goodness, I'm sorry to hear that! We've all been there. If you're willing to try something to remove the stripped screw, you can check out this guide for some strategies. Please let us know how it works out!
Thanks for these great instructions, much easier than following a video. I couldn’t find which width of Tesa tape to use, I used 2mm which worked fine. Was also unsure how much heat-conducting paste to use, so I guessed! My biggest problem ( nothing to do with the instructions); was that the old screen was so firmly stuck that it wouldn’t lift at all, it was only possible to remove it by breaking it some more. Anyway, new screen is now fitted, so my kids are going to be very happy to be able to use it in handheld mode again.
Hi,
Do you have this tutorial in Spanish?
Nice job!
Regrets from Honduras.
Sincerely,
Gerardo Carbajal
He seguido tus pasos al pie de la letra, pero he usado un secador de pelo para separar la pantalla, a distancia corta de la misma, solo en los bordes, con un tiempo inferior a 20 segundos. Antes de separar la pantalla antigua he probado la nueva y funcionaba correctamente aunque ambas presentaban el problema de no funcionar el tactil, aun asi segui en mi cruzada y monte la pantalla nueva sabiendo que ya funcionaba ( al menos la imagen ) y al tratar de encenderla la pantalla no mostraba imagen, pense que era la bateria y lo conecte a la corriente, al intentar de nuevo sono un bip pero no habia imagen, pense que habia cometido algun error asi probe la pantalla antigua y nada, sin imagen, a que podria deberse este problema?