이 번역은 원본 안내서의 최신 업데이트를 반영하지 않을 수 있습니다. 번역 업데이트를 돕거나 아니면 원본 안내서 보기를 참조하세요.
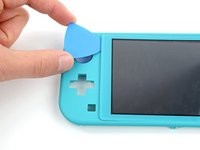
소개
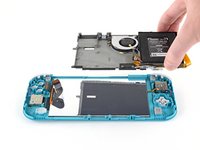
이 안내서를 사용하여 Nintendo Switch Lite의 스크린을 교체하세요. 스크린은 LCD와 디지타이저로 구성되어 있습니다. LCD만 교체한다면 이 안내서를 따르세요. 디지타이저만 교체한다면 이 안내서를 따르세요.
참고: 이 안내서를 완료하려면 교체용 접착제가 필요합니다.
참고: 조이스틱과 버튼을 분리할 필요는 없지만 분리하면 수리가 훨씬 수월해집니다.
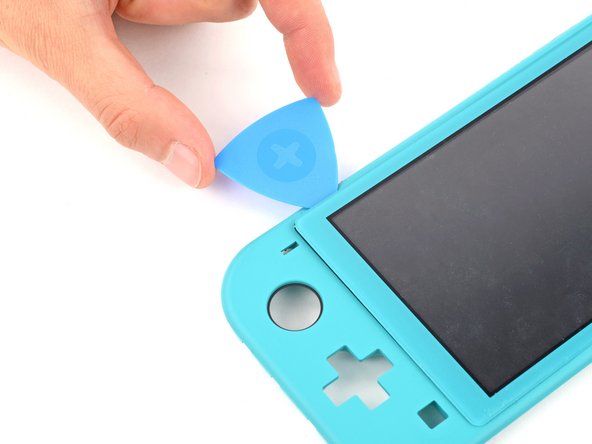
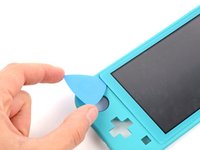
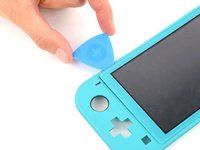
필요한 것
-
이 단계에 사용된 도구:Magnetic Project Mat$19.95
-
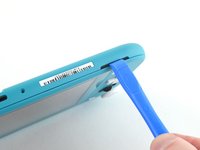
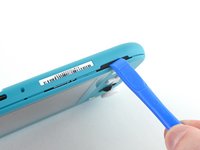
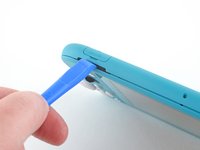
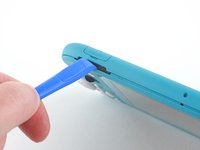
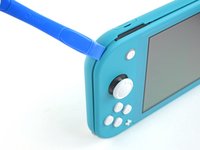
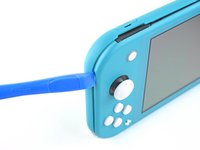
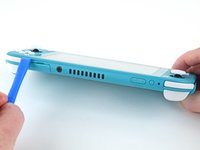
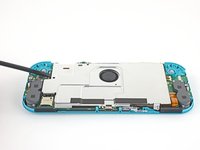
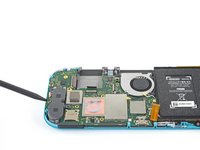
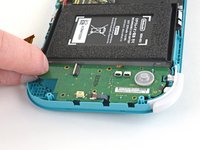
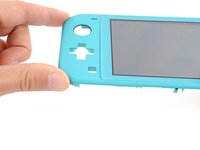
Y00 스크루드라이버를 사용하여 후면 패널을 고정하는 6.3mm-길이 나사 네 개를 풀어주세요.
-
-
-
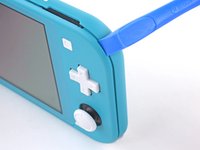
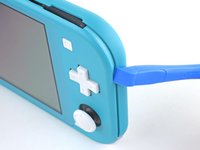
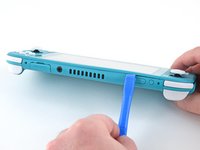
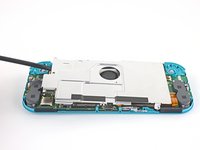
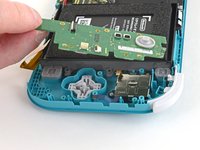
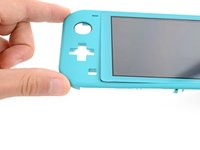
JIS 000 드라이버 또는 공식 iFixit PH 000 드라이버를 사용하여, 후면 패널을 고정하고 있는 다음 나사들을 풀어주세요:
-
기기 상단의 3.6mm-길이 나사 두 개
-
기기 하단의 3.6mm-길이 나사 두 개
I accidentally stripped the back screw and now I can't open it. I removed all the other screws. What should I do?
-
-
-
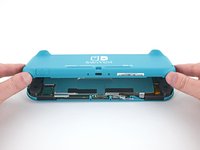
JIS 000 또는 공식 iFixit PH 000 드라이버를 사용하여 다음 나사 네 개를 풀어주세요:
-
3.1mm 나사 세 개
-
4.5mm 나사 한 개
There are four screws instead of three mentioned
With how easy it seems to be to do serious damage with the next few steps, I figured I'd say that realistically you can skip steps 9-13 when doing this repair. While they provide a bit of extra security by disconnecting the battery, the left stick is completely accessible and replaceable without touching the heat shield or anything underneath (And steps 17 and 18 disconnect power from the daughter board regardless).
i stripped a &&^&^$^ screw
Well I actually removed the screw right next to the 4.5 screw. I did not realize it till my son showed me why the plate wouldn't release. Ha ha, it's funny now but yeah not a big deal. I could have bent it badly assuming I took all screws out though. For anyone reading this before going in. 👍
Toastninja - 답글
-
-
-
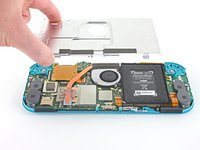
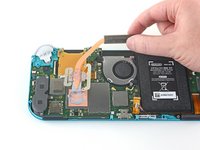
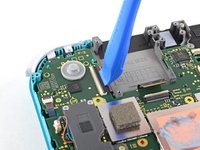
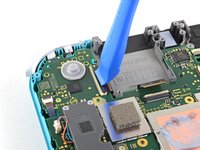
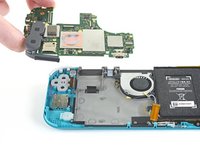
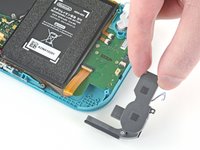
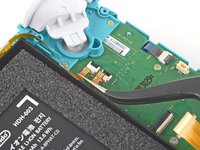
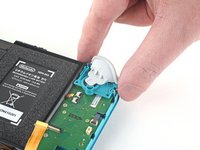
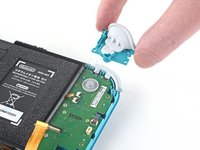
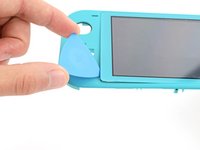
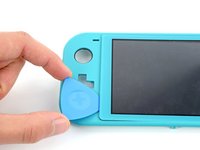
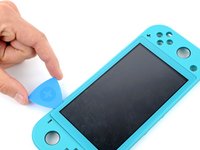
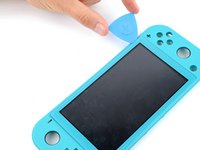
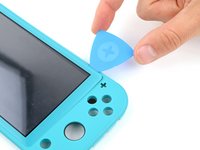
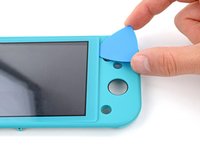
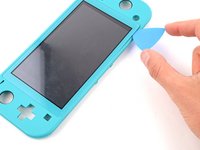
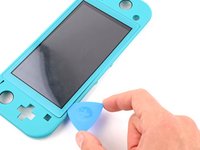
Spudger/스퍼저 또는 손가락을 사용하여 실드 플레이트를 위로 들어올려 기기에서 분리하세요.
-
실드 플레이트를 분리하세요.
What type of Thermal Paste would you guys recommend? I clicked on the picture but nothing.
Personnaly i use some Mx-6 from Artic, really good quality/price, never have to complain.
Nothing -
-
-
-
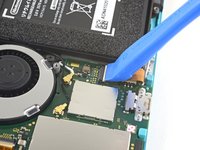
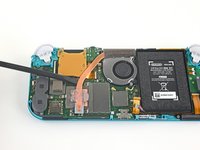
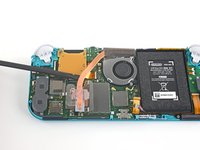
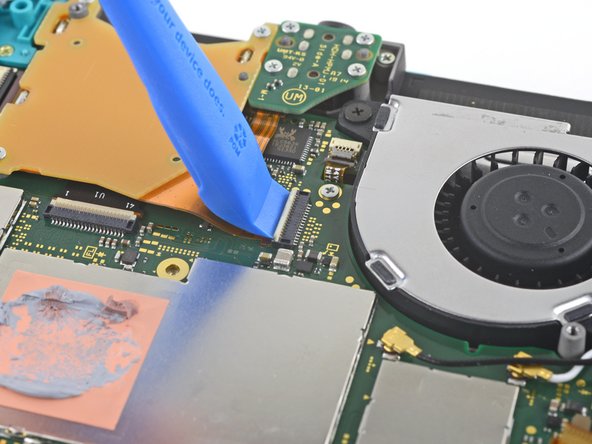
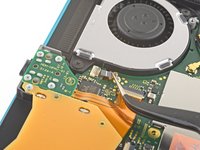
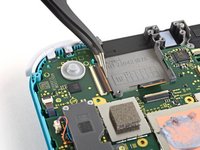
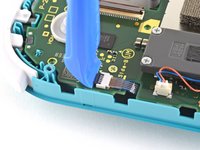
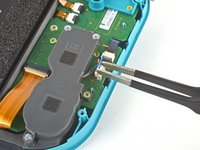
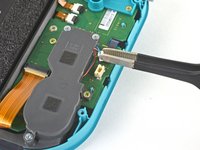
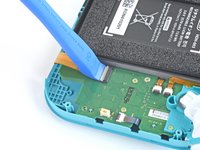
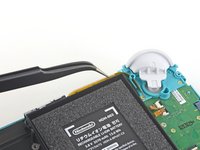
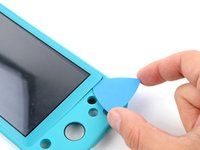
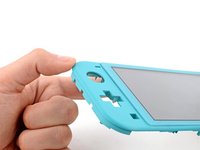
여는 도구 또는 손톱을 사용하여 마더보드 상호 연결 케이블 ZIF 커넥터의 작은 힌지 잠금 덮개를 뒤집으세요.
The clip broke off when trying to remove this cable. Audio only works through headphones and the display now won’t turn on after the clip broke. Does anyone know where I could get a clip or how I could fix it without it?
Mi è successa la stessa cosa è non so come ripararla! Chissà se c’è un modo!
-
-
-
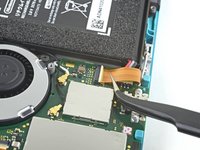
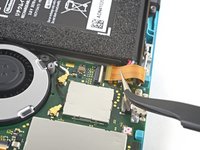
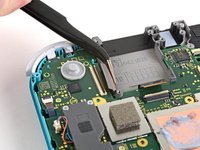
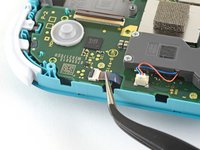
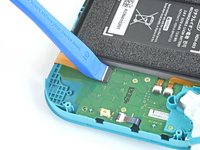
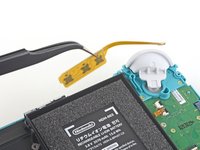
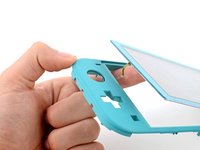
핀셋을 사용하여 마더보드의 커넥터와 연결된 상호연결 케이블을 빼내세요.
I turned the unit off beforehand, I used tweezers just like the instructions said (ifixit branded) , my device sparked and now it won’t turn back on
The flap came off is it important or is there a way t fix it?
We're you able to get it working without the white flap? My screen is not working after putting it back together and i noticed this white flap was falling off
Did you get it working without the white flap? Everything on the switch works fine except for audio going through headphones and the display not turning on.
do not use metal sharp pointed tweezers! you will rip your ribbon cable. Use the inside of a Bic type pen or something else dull and plastic to pull the cable away by putting the pen part where the first bend is.
Maybe tape the Tweezers or smear some hot glue on them to insulate them to save you time and money.
Maybe put all the Warnings at the start of the guide as well. We fix it geeks tend to get excited when fixing things 😁
-
-
-
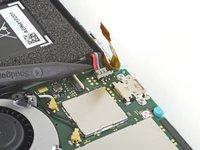
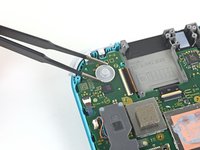
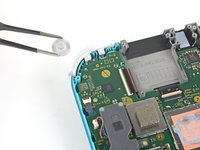
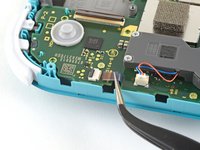
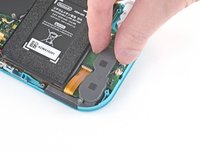
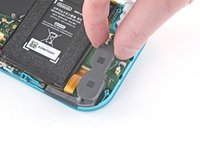
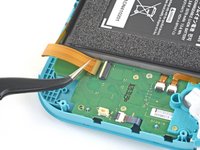
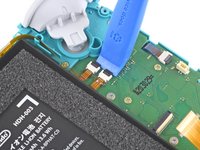
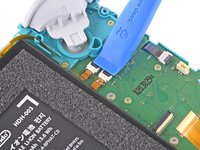
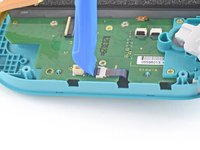
Spudger/스퍼저 끝을 사용하여 배터리 커넥터를 마더보드 소켓에서 똑바로 들어 올려 빼세요.
Caution the connector may not be properly soldered onto the motherboard. For me it snapped off the pins and now have to find a place to get that fixed if even possible. may have bricked it.
Yup, broke the connector right off the motherboard. Thanks, ifixit -_-
I backed out when I reached this point. I couldn't risk damaging it. Do u just need to pull it up? Did you mean that it might have been soldered shut below?
Jannalyzer - 답글
You should just need to pull straight up, but make sure you’re pulling on the wires or the gray plug—do not pull on the black socket or it can snap off of the motherboard.
With how easy it seems to be to do serious damage at this point, I figured I'd say that realistically you can skip steps 9-13 when doing this repair. While they provide a bit of extra security by disconnecting the battery, the left stick is completely accessible and replaceable without touching the heat shield or anything underneath (And steps 17 and 18 disconnect power from the daughter board regardless).
just broke my connector... ifixit PLEASE put a warning on how fragile the solder on this connector is.
Note for this step, you do not need to apply a lot of force. I used two tools here: small screwdriver to hold down the black base, and one side of fine-tipped tweezers to get under all 3 wires. Gently, push down on the tweezers to push the wires upwards, which should force the gray connector up and off the base. It did not take a lot of force. Take your time and it will be fine. Again, like others have said, do NOT pull or pry up the black base.
-
-
-
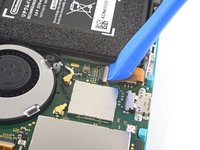
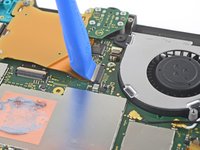
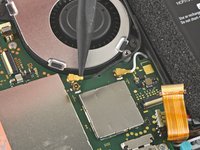
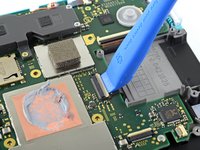
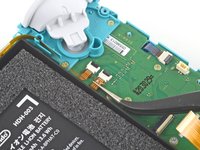
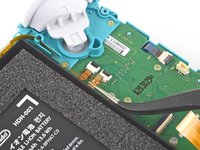
스퍼저의 납작한 끝이나 손가락을 사용하여 팬에 살짝 붙어 있는 폼을 조심히 떼어내세요.
When reassembling, the foam may fold down between the fan and heatsink, blocking airflow. Gently lift the foam back up on top of the fan. The adhesive film should hold the foam together.
Kean Stump - 답글
Is removing the heat sink absolutely necessary?
It’s not necessary, but it makes it much easier to remove and replace the game card reader, since the heat sink partially covers the connector.
Not really…….. I never remove it. It slides out quite easily once disconnected.
Alan Sears - 답글
-
-
-
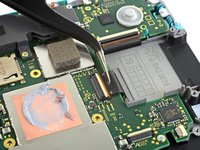
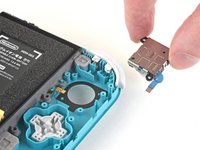
JIS 000 또는 공식 iFixit PH 000 드라이버를 사용하여 방열판을 마더보드에 고정하는 3mm 나사 3 개를 풀어주세요.
Non le tre ventole ma le tre viti
Grazie per avercelo segnalato! Ho apportato la modifica. iFixit è una wiki, quindi ogni utente può modificare le pagine: se trovi altri errori in futuro, sentiti libero di fare la modifica tu stesso!
-
-
-
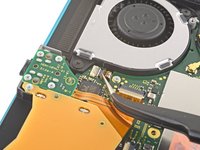
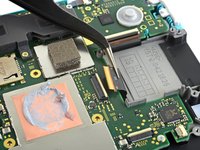
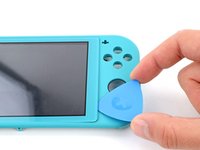
스퍼저 또는 손가락을 사용하여 방열판을 들어 올려 마더보드에서 분리하세요.
16.5 remove cartridge / headphones jack……….
My kit did not come with thermal paste..
-
-
-
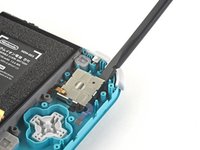
Phillips/십자 스크루드라이버를 사용하여 오른편 트리거 버튼 어셈블리를 마더보드에 고정하는 4.5mm 나사 두 개를 풀어주세요.
I think a whole step to remove the game card reader and speaker jack was skipped here…
yes, just found that sadly these comments do not show unless we click on the , which is unhelpful
also, you need to remove the left trigger button
-
-
-
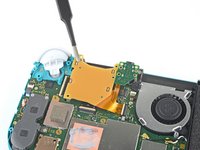
Spudger/스퍼저 끝을 사용하여 검정색 안테나 케이블을 마더보드 소켓에서 똑바로 들어 올리세요.
-
흰색 안테나 케이블에 동일한 과정을 반복하세요.
-
-
-
-
핀셋을 사용하여 마더보드 커넥터에서 팬 케이블을 밀어내세요.
There’s a step missing after this to remove the screws that hold the orange game cartridge slot. Those 7 screws have to be undone and the ribbon unclipped first before moving on to the next step.
Good Looking out!
-
-
-
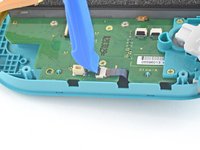
여는 도구 또는 손톱을 사용하여 스크린 케이블 ZIF 커넥터의 작은 힌지 잠금 덮개를 위로 젖히세요.
skipped a step or two about removing the golden piece in the photo above, and the other little board
If I broke the clasp on the ZIF connector can I elec tape it down?
What did you do to fix it if the ZIF connector broke?? Mine did too and I worry that is why the screen won’t turn on now
Missing the card reader + audio jack board removal. Just remove the 4 screws around the audio jack + 3 screws around the card reader and disconnect the ZIF connector from the motherboard.
-
-
-
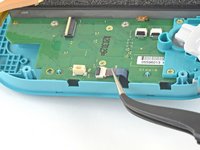
여는 도구 또는 손톱을 사용하여 디지타이저 케이블의 ZIF 커넥터의 작은 힌지 잠금 덮개를 뒤집으세요.
-
-
-
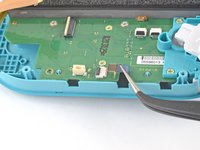
Phillips/십자 스크루드라이버를 사용하여 마더보드를 고정하는 다음 나사를 여섯 개를 풀어주세요:
-
3.1mm 나사 세 개
-
4.5mm 나사 세 개
how to get the c port off
When re-assembling, be sure the fan cable (step 25) is completely pulled through prior to tightening the screw that’s right next to it.
-
-
-
핀셋 또는 손가락을 사용하여 왼편 스피커 케이블을 똑바로 위로 당겨서 도터보드 소켓에서 빼세요.
pulled from the connector, not the wires, and ended up ripping them off the connector anyways since it encountered tension from the other end (the gray chamber on the left)
consider doing step 15 before pulling the wire, just in case.
Why even disconnect this cable. Not worth the risk leave it connected to daughter board.
while doing this I ripped the pad on the circuit board off. Should i risk trying to repair it or should i just try to go without the speaker???
I also accidentally ripped off the connector, disabling the left speaker. However, that will not break any functionality of the switch. The right speaker works just fine on its own (just remember to turn the audio to mono in system settings) and I was successfully able to replace the joystick. Although the audio quality is a little bit depleted, you barely notice it if you turn up the volume a little, and I think being able to actually MOVE FORWARD in my games is a better plus than having louder, stereo, audio.
Went to pull the speaker connector and it pulled right off the motherboard. Would not come loose.
I'm gonna echo what others said here and suggest that you skip this step. After you complete Step 15, you can just move the speakers enough with your fingers to complete Step 26, which involves a screw half underneath it.
Regarding the ribbon cable in Step 17 & Step 18, you can honestly use your fingers if they're small enough. The ribbon cable is wide enough for you to press down on it a little and slide it out bit by bit.
Overall, this makes the disassembly and eventual reassembly process easier and lets you avoid running the risk of damaging or completely tearing out the wires, like I almost did.Removing the screw from 37 is enough to give you space to remove the board, I honestly think you shouldn't try to remove this connector.
Unfortunately, I had to reinstall multiple daughterboards on the same Switch Lite. I strongly recommend orienting your straight tweezers with ridges (like the ones in the picture) perpendicular to the device. Grab the plastic connector with the tip of the tweezers from the top. It makes inserting and removing this connection significantly easier.
-
-
-
핀셋을 사용하여 왼편 조이스틱 케이블을 도터보드 커넥터에서 밀어내세요.
The connector for my left joystick broke. Is there a way to fix it?
How badly did it broke?
-
-
-
Phillips/십자 스크루드라이버를 사용하여 다음 나사 네 개를 풀어주세요:
-
4.5mm 나사 두 개
-
6mm 나사 두 개
The two 4.5 mm screws were very difficult to remove here and ended up getting stripped. I CANNOT remove them, help!
-
-
-
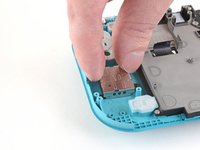
손가락으로 도터보드를 들어 올려서 홈에서 빼세요.
Stop here if repairing Switch Lite for joycon drift. After removing daughter card you can see the bottom of the joystick. This thin metal actually bends during use causing bad connection of joystick. If you cut out a business card the same size as the joycon and put it on the bottom of the joystick it gives the metal enough backing to fix the issue. I used two layers with just a small bit of glue stick to adhere it. Put it all back together and you will find your issue is fixed.
That's great, but it's only Temporary.
You may as well put a New Stick in (preferably Hall Effect) after going through Hell to open the darn thing.
If you do choose the cardboard route, you may as well clean the innards of the Joystick, BUUUT, it's not easy getting the Joystick back together.
Daughterboard. That's a new one for me.
-
-
-
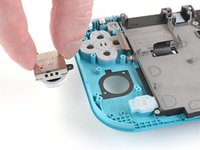
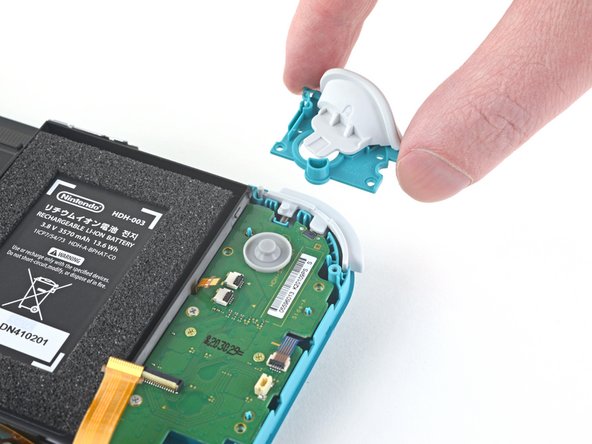
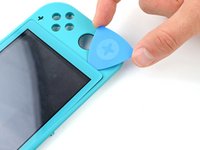
Spudger/스퍼저의 평평한 끝을 사용하여 조이스틱을 들어 올려서 홈에서 빼세요.
-
손가락으로 조이스틱을 분리하세요.
During reassembly when putting the screws back in, slowly turn them CCW until you feel it drop into its thread. You will never crossthread them by doing this.
-
-
-
JIS 000 드라이버 또는 공식 iFixit PH000 드라이버를 사용하여 중앙프레임 어셈블리를 고정하는 나사 네 개를 풀어주세요.
-
2.5mm 나사 세 개
-
6mm 나사 한 개
-
-
-
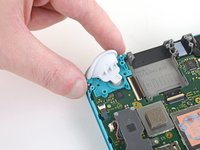
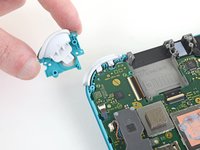
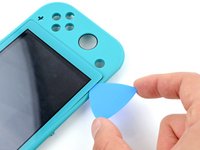
Spudger/스퍼저를 사용하여 손가락으로 잡을 수 있을 때까지 중앙프레임 어셈블리를 들어 올리세요.
-
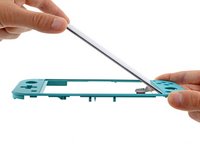
중앙프레임 어셈블리를 잡고 위로 당겨서 분리하세요.
-


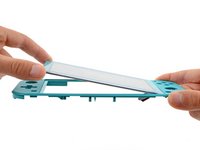
새 교체 부품을 원래 부품과 비교하세요—설치하기 전에 나머지 부품을 옮기거나 새 부품에서 접착 뒷면을 제거해야 할 수 있습니다.
.기기를 재조립하려면, 이 지침들을 역순으로 따르세요..
전자 폐기물을 R2 또는 e-Stewards 인증 재활용 센터로 가져가세요.
수리가 계획대로 진행되지 않았습니까? 기본 문제 해결 또는 자사의 Nintendo Switch Lite 답변 커뮤니티에서 도움을 받으세요.
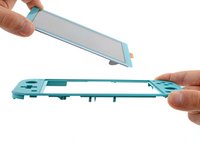
새 교체 부품을 원래 부품과 비교하세요—설치하기 전에 나머지 부품을 옮기거나 새 부품에서 접착 뒷면을 제거해야 할 수 있습니다.
.기기를 재조립하려면, 이 지침들을 역순으로 따르세요..
전자 폐기물을 R2 또는 e-Stewards 인증 재활용 센터로 가져가세요.
수리가 계획대로 진행되지 않았습니까? 기본 문제 해결 또는 자사의 Nintendo Switch Lite 답변 커뮤니티에서 도움을 받으세요.
다른 17명이 해당 안내서를 완성하였습니다.
다음 번역가들에게 특별히 감사 드립니다:
85%

Christian Kim님은 저희가 세상을 수리하는데 동참하신 분입니다! 기여하시겠습니까?
번역 시작하기 ›


댓글 2개
Thanks for your guide - it was very helpful, first time I took screen off without breaking it off :). I also bought the iFixit kit with the heat pad. I can now see that the trick was not so much a lot of heat, but heat evenly along the whole side
omg you are a lifesaver thank you so much
All my screws got stripped any ideas on how to remove?
Almost A Mammal - 답글
A Y0 screwdriver seemed to work better for me.
Tommy Morrill - 답글
What type of screw driver do I use to un screw the screws and which way
Luca Capito - 답글
Y 0.6 was all I had but it seemed to fit perfectly
Trevor - 답글
Like really snug? I've gotten away with using Drivers either bigger or smaller but I hate doing it. But if 0.6 is the exact size I need, then I'll get that. I don't wanna strip my client's Switch Lite's screws.
Vincent Valodze -